Mothbox v3 - Design and Thoughts?

Hi folks! a project @Hubertszcz and i started up last year got some more funding thanks to the experiment.com thing. We got about 4-5K we are putting towards designing a new version of the device

What is it?
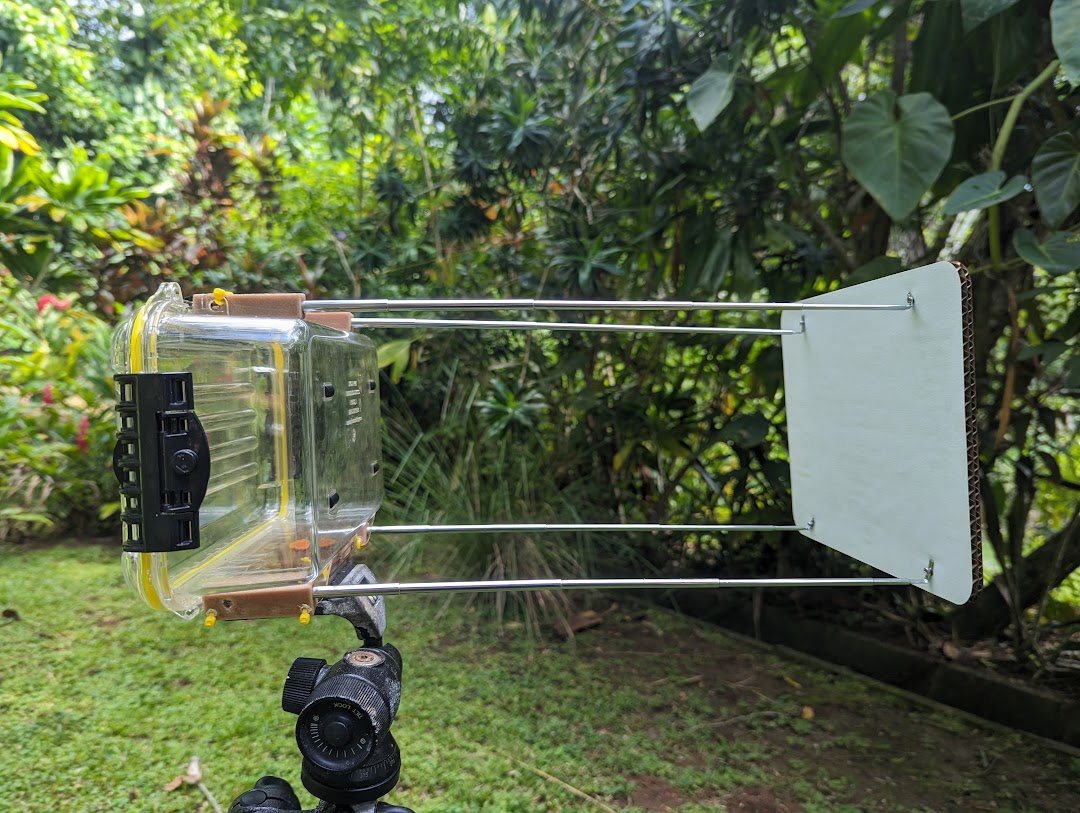
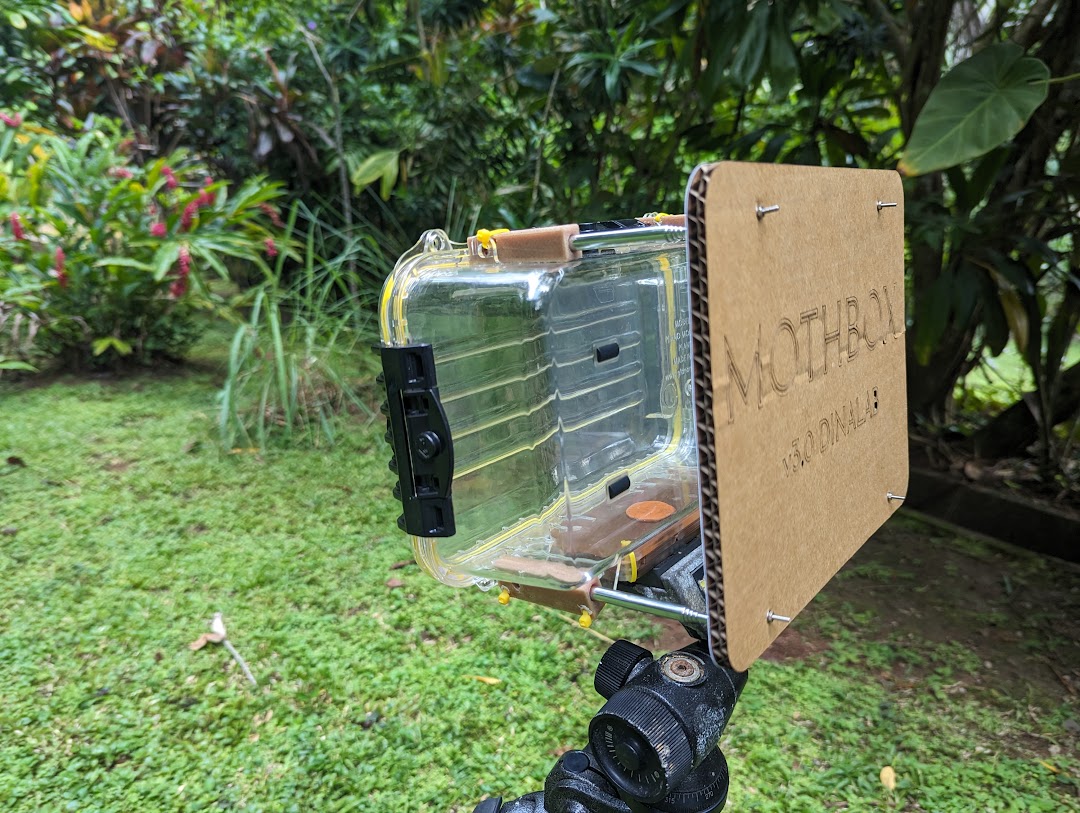
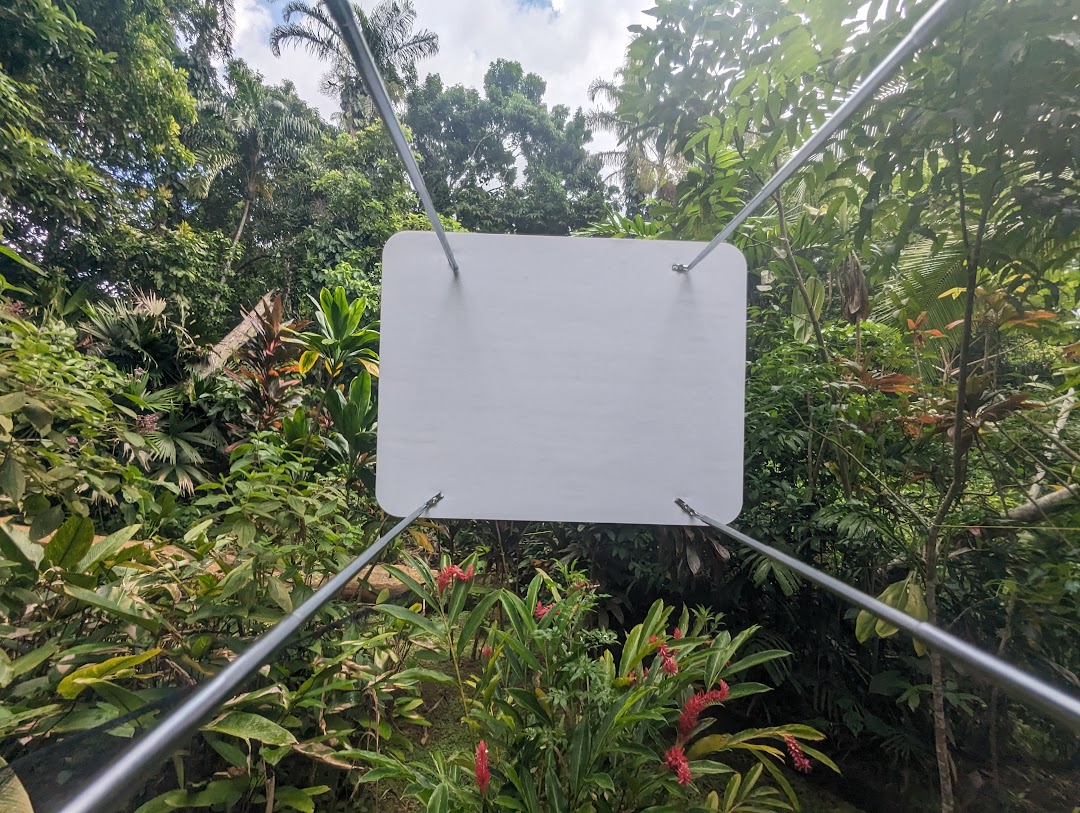
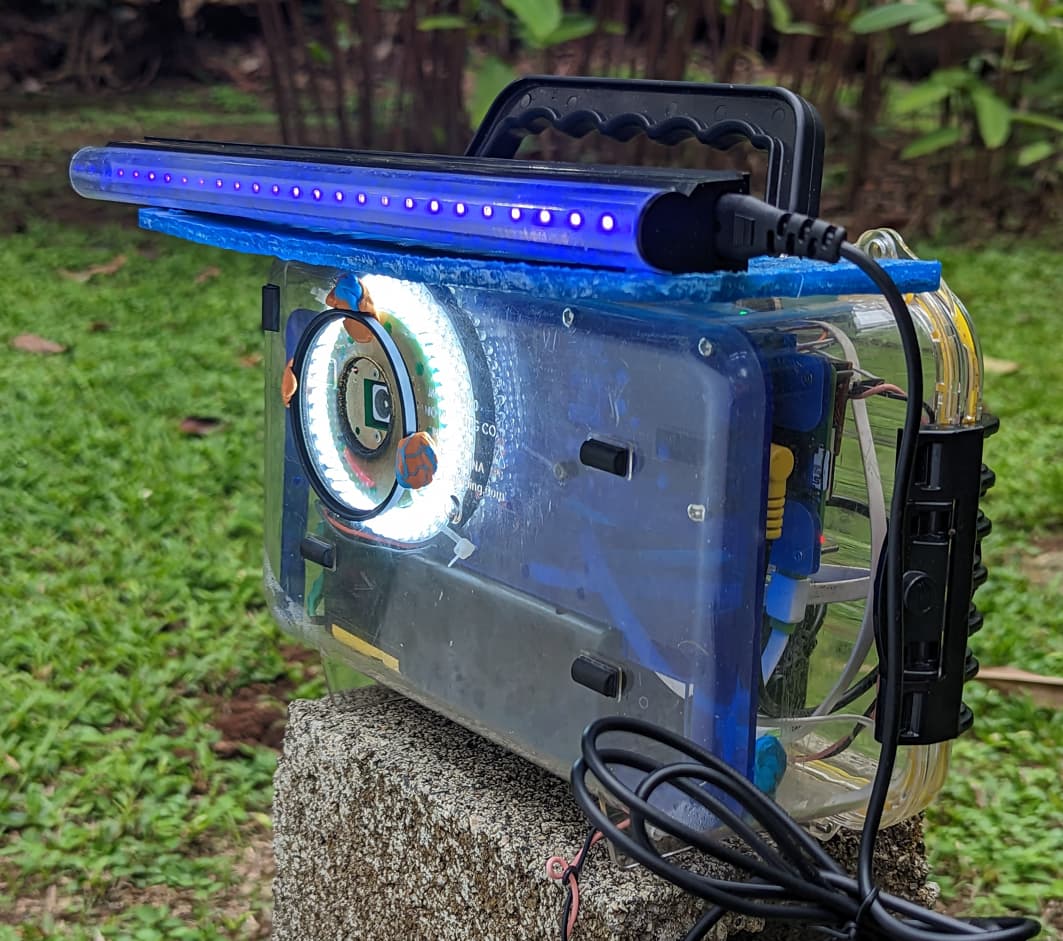
an automated device that lights up a sheet and documents the insects that visit it.

We originally made it for reforestation groups that will use it to monitor changes in biodiversity (this is what @Hubertszcz is up to).

This is how scientists usually use this technique for studying biodiversity

but they have to hang out with this sheet all night and take photos of each individual moth. This is a very time consuming thing that generally requires a good amount of expertise. The mothbox is designed to try to automate this in a cheap, accessible way!

Here’s some design targets for it:

  • be weatherproof and self-contained and functioning while left outside in the rainforest for a month at a time
  • automatically turn itself on for 4 random nights during that month
  • get high quality images of the insect visitors (for instance moths that are only 5mm long) that can be processed later
  • be reliably usable by non-experts
  • cost less than $400 in parts
  • the attractive/ photographable area should be at least the size of an A4 piece of paper (210x297mm)
  • adaptable to use different types of lights

our current version has been built and tested over the past couple months
these are some example cropped images


we need to work on the exposure settings of the camera but other creatures also visit it


This is a (not great) full image of the entire sheet. You can see a insect flew in front of the light in this one, usually they are clearer, but just showing there are always exceptions.

Current State:
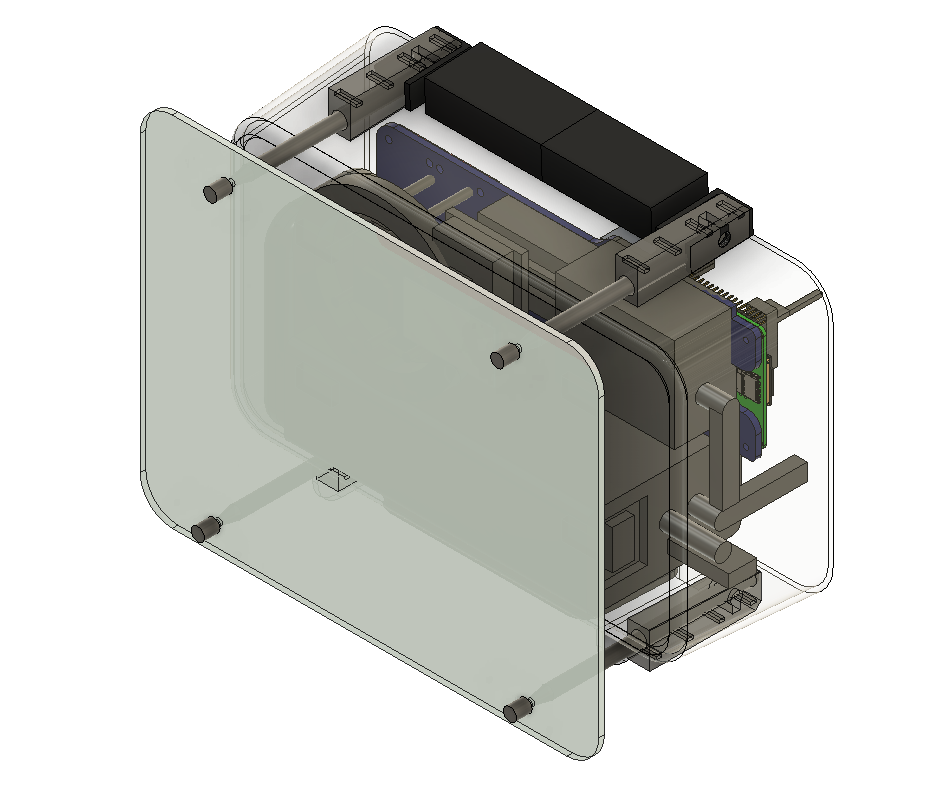
Right now the project consists of a pretty nice compact box with lights connected to a RPI4 and a Arducam 64MP camera. It connects to a big battery (38 Amp hour) Amazon.com

full parts list here

The device can run for about 10 hours, which is enough for maybe 1-2 nights. The big lights it uses are pretty power hungry LED black lights (they use 5V 40ma), and the pi uses something like 5V 10ma. it uses mechanical relays to turn the lights on and off. It has a real time clock to keep time.

In earlier versions we used a Pi because we were going to make a thing that connected to the internet and did on-board image processing, and used the 64 mp arducam. thus needed to use a RPi.

but our next version doesn’t necessarily need to use a Pi if we can find a high quality thing that can take images just as cheaply.

Questions for yall:

  • Anyone got experience doing ultra-low power stuff with RPi’s? i thought it would be more straightforward
  • Anyone got suggestions in other things that could be triggered to take nice high res photos of insects that doesn’t necessarily need a pi?
  • What’s a good place to host/document this project as we work on it? Right now all our stuff has been just on a big google drive. I know @julianstirling uses gitbuilding, though i have never used it myself. Any other tips on nice practices for starting up an open science project nicely (this time since we have more than a couple weeks to slap things together on v2 of this project?)
2 Likes

I think it is nice where possible to host the docs in the same place you host other aspects of the design. This way everything is in one place as much as possible. Not sure how many CAD files you have. We use GitLab for this, you can then write you docs in GitBuilding, or in plain markdown (the syntax you use in this forum) or in any other type of file.

GitLab/GitHub Pros/Cons

Pros

  • Anyone in your community can make their own copy of the project and suggest changes back. However you remain in full control of your own version.
  • Built in project management that is open to your community. You can track what needs to be done, users/community members can comment, and contribute to the discussion, request new features, or report problems

Cons

  • User interface/workflow is software focused and can be confusing to non-programmers. This is a problem if the core team aren’t comfortable with Git. For community members that are not comfortable with Git, we tend to just point people straight to the forums and say talk to us there.
2 Likes

Thanks @julian!

1 Like

Im chatting more design stuff about this project over on wildlabs too

1 Like

Some fun updates on the low-cost automated insect detector design! I added a custom tripod mount so we can set them up on cheap tripods in the field (or anything with a 1/4in bolt). I have also made a fun mechanism using telescoping rods that holds the target out when deployed (to attract and photograph moths, and it collapses to protect the lens when being transported. Plus it adds a pretty fun flair to the project!

Goal is to make it strong, compact and easy for field biologists like Hubert @Hubertszcz or conservationists like Azuero Reforesta https://www.proecoazuero.org/ to set up.

The next version will shift how it holds the rods so the target can collapse all the way to the lens for A) better compactness B) lens protection. But this first prototype works great!

Also the current target is currently just cardboard I’m prototyping with, the real one will be slippery plastic with cloth on the target side to lure in insects to land.


The rods I use are these cheap magnetic telescoping pick up tools you can find online for about a dollar each. They seem quite strong and to be made of stainless steel so I think they should last okay out in the wild (like retractable antennas on cars)

If you unscrew the magnet there is a super short m2 bolt thread, but i couldn’t figure out a good easy way to attach that to my target. So i actually ended up snipping and flattening and drilling a hole to then put my own bolt through. If someone has a better or more elegant solution, i would love to know!

Ahh i solved my conundrum of more elegantly attaching the rods. Just made tiny 3d printed holsters that attach


1 Like

More developments in our little trap with the rods. It folds flush now. This design would work well for the original drone-deployable concept this project was partially born from, you could just replace the rods with linear actuators.


1 Like

Though building this has made me think of other ways of creating this with fewer moving parts that might be a little more low tech, and harder to automate for like a drone for instance, and perhaps a bit slower to set-up, BUT rapid setup isn’t as much of a concern for what @Hubertszcz will be doing as robust reliability.


I also been thinking about ways to design it so it’s more agnostic about exactly which shape box we use. The custom tripod mount I made can already be screwed into any kind of box, and so if we find ways to make our target attach to the tripod mount we won’t have to be locked into the geometry of the specific box we are using.

So I worked on some design concepts for these next ideas which would have targets that still collapse in for portability and protection but which are much more low tech, like just slabs of plastic that fit into each other and then connect to the tripod plate.

The idea with this other version is it would be a lot more robust, simpler to build, don’t necessarily need a 3d printer to make (or repair) , and fewer special parts to order (than the rod version). It will probably be slightly heavier and bulkier than the rods, but i tried to keep it pretty tight


3 Likes