Feedback (funback) on the OpenFlexure Microscope workshop
(Video included: https://vimeo.com/213341233)
“Failure is success if we learn from it.” - Malcolm Forbes
One of the goals of the workshop, organized by Richard Bowman (@rbowman) was to test the latest version of the documentation for assembling the OpenFlexure microscope (Workshops / Travel ideas (it's editable so put your stuff here!)). With this in mind, we set out to build one of the microscope kits guided only by the available instructions. It turned out not to be as easy as expected and we were not able to complete the assembly, but it was really fun and we learned a lot in the process. We believe our experience could help to improve the documentation of this project, and maybe others too.
You can watch the video of the building process here: https://vimeo.com/213341233
And this is what we learned during the workshop:
About workshop organization:
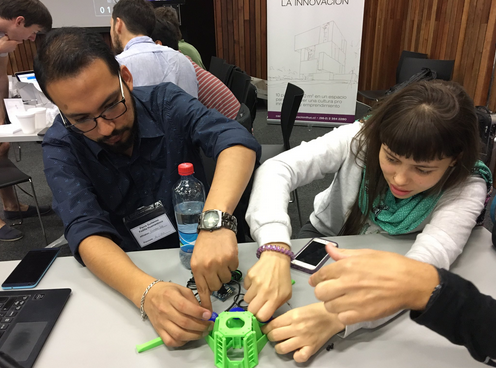
It’s really important to know how many participants can work with one kit, and to organize the groups accordingly. It was 7 of us in our group, and it was not possible for everyone to fully engage in the assembly process. Only 4 of us could work simultaneously on the microscope (see photos).
In the case of microscopes or similar equipment, it could be useful to dedicate some time during the workshop to show the assembled hardware, and for the participants to use it and test it, besides assembling it (or trying to).
If you organize a workshop early in the morning after a night event, make sure to have plenty of coffee available for the participants. According to our observations, the assembly process started only after a dose of 2 cups/person, but beware that more than 4 cups could lead to microscope damage. Recommended dose: 3 cups/person.
Laughter increases oxygen flow to the brain, and fun workshops allow participants to remember everything! Y no estar tristinho! 
About documentation:
DocuBricks seems a good documentation platform but it still has a problem with some web browsers (e.g., we were using Chrome and some images were not visible). Also, we were using an offline version of the documentation (instead of the docubricks website) and it was sometimes confusing, since the assembly steps were not in order. Although this might not be a problem when using the docubricks platform, for many situations it is necessary to have an offline version or a printed version.
Besides a detailed explanation of each assembly step (which this documentation had), it could also be helpful to have a general guide with an overview of all the steps, and where to find them in the documentation (in the version we used, the order in which the assembly steps appeared was not clear).
In case there are different versions of a kit (as in this case), the documentation should have a clear reference to the different kits available, so as to be sure of the parts needed for each version, and the associated assembly steps.
Including warnings in the documentation can be useful. In our case, we were not aware that some of the 3d printed parts were very fragile and we ended up breaking one of the moving parts (during one our assembly-disassembly cycles). Also electronic circuits and cameras can be very fragile. In other cases, also safety warnings etc could be useful.
Group participants:
Gina Leite (@talktogina)
Gustavo Pereyra Irujo (@gpereyrairujo)
Hamilton Mestizo (@librepensante.org)
Juan Pedro Maestre (@juanpedro.maestre)
Paz Bernaldo (@pazbernaldo)
Yuliana Rodríguez (@julieta)
Video by @pazbernaldo
Thank you @rbowman for this workshop 
 This is also really useful feedback, and there’s a few points for me to put into the documentation. Also I should definitely link to this from the microscope wiki

