I am currently working on replicating the Mothbox Pro as part of the Replicator Team working out of the Machine Agency in the University of Washington’s HCDE department.
I will be documenting the full process here and be giving updates throughout my Mothbox journey!
I parsed though the bill of materials for both the DIY version and submitted an order request for the items I need.
The Mothbox Parts List seems to be up to date and easy to navigate and the total ballpark cost for both the Pro and DIY versions was around 1000$ not including the breakdown of bulk components, the manufactured PBC, and filament for 3D printed parts. This slightly higher cost seems to be due to the increase in price for some of the electrical components.
When ordering, some off the amazon links were out of stock, but I was able to find replacements that work within the schismatics.
I opted for the PB240B1 (24 volt) since the 12 volt version was out of stock but that seems to be a common issue. Looking at the links now, the 12 volt version is currently back in stock.
Once components start to arrive, I will update this post.
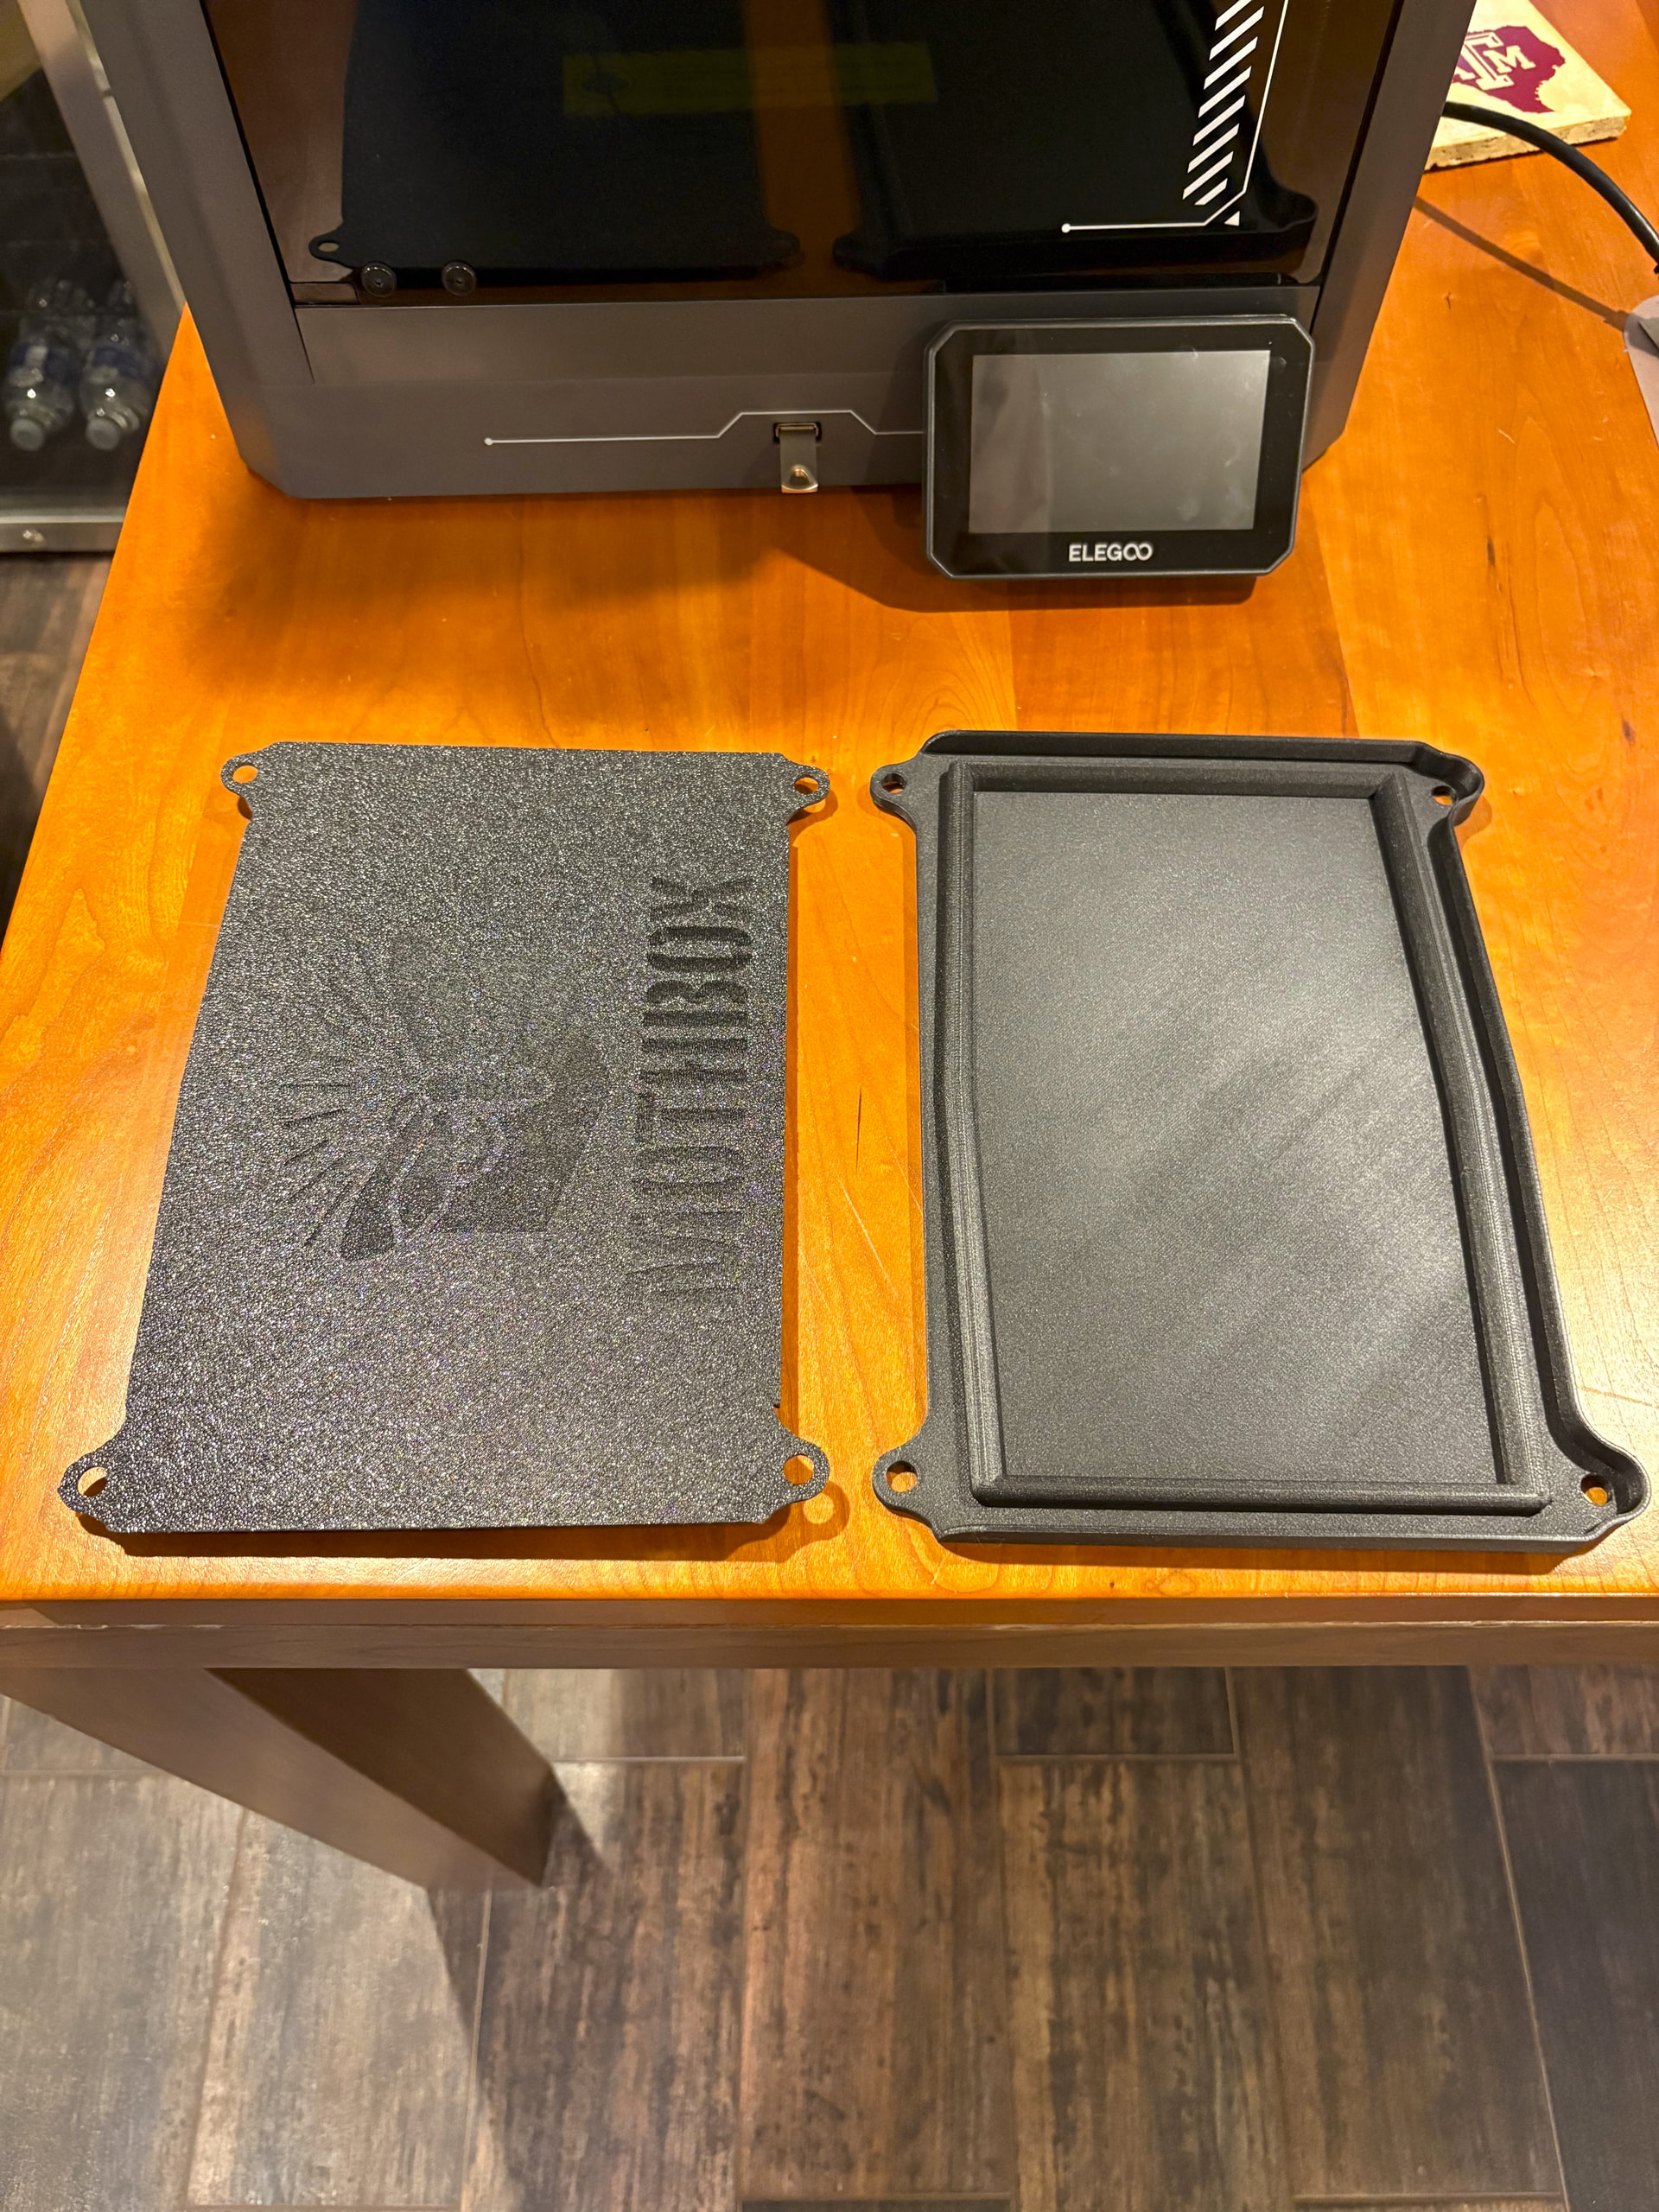
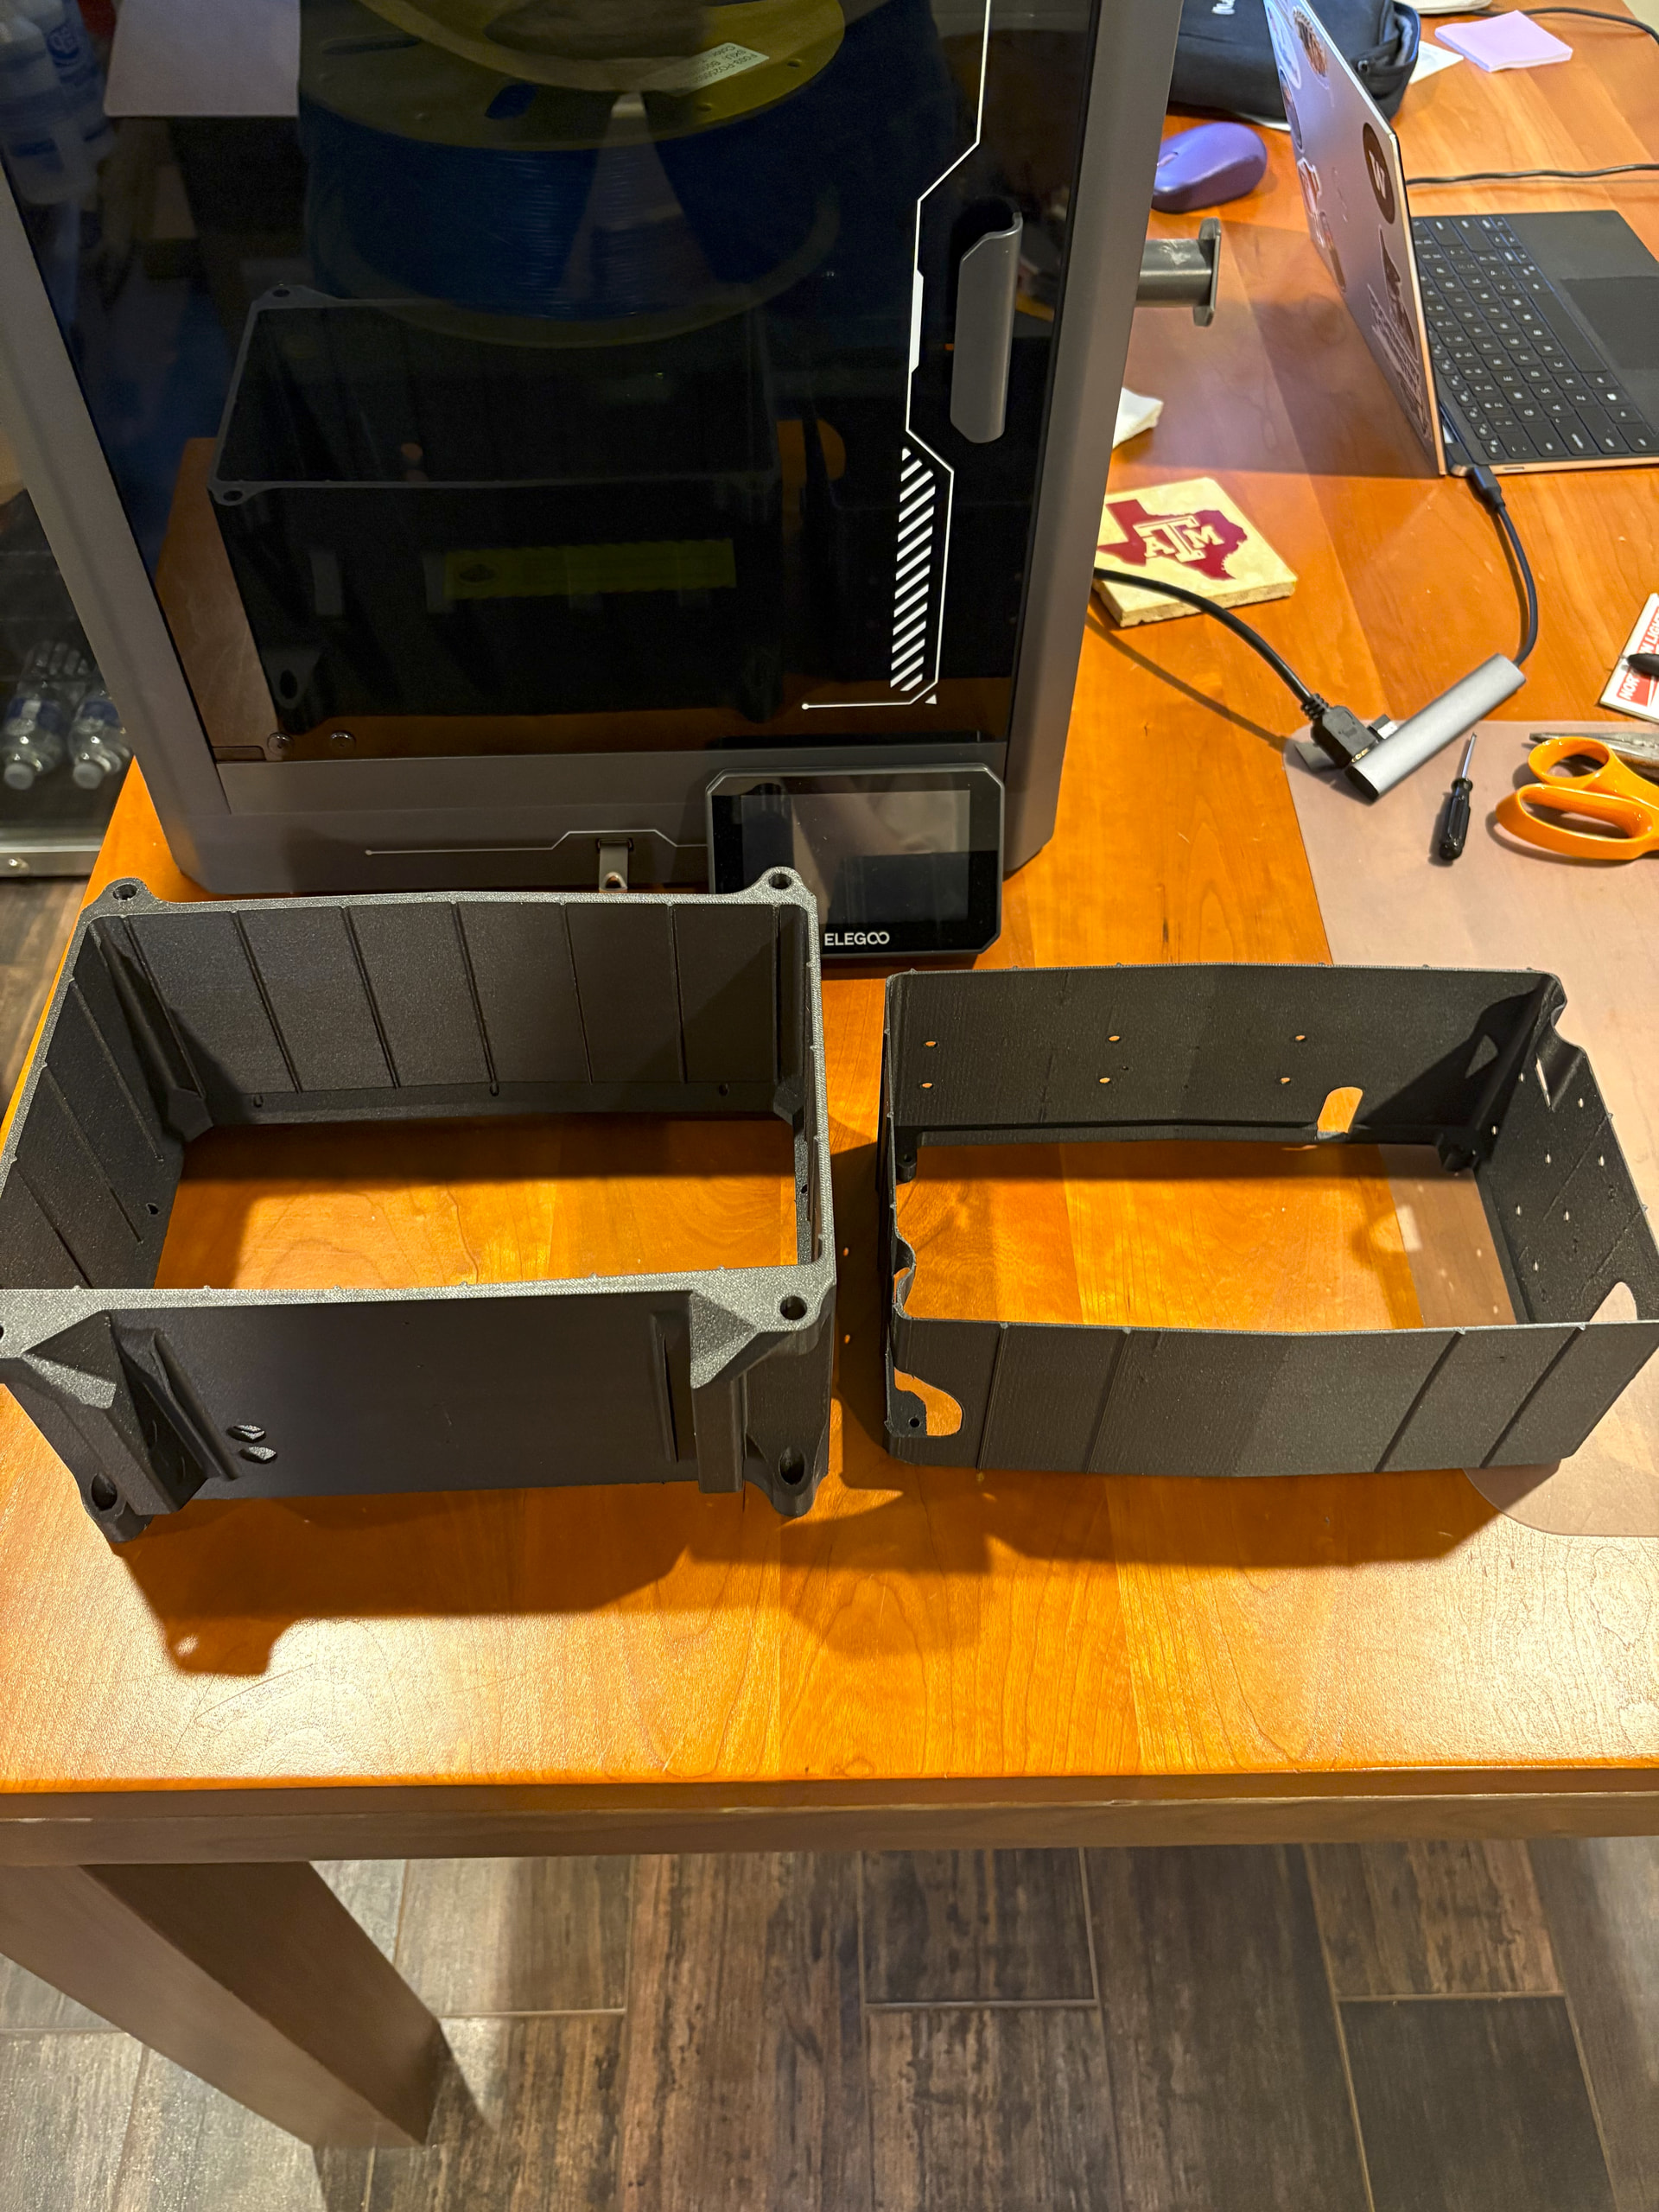
I have been using an Elegoo Centauri Carbon for printing the Mothbox Pro case. I used ERYONE Carbon Fiber PETG filament and found that 2 140g spools allowed me to print 2 full Mothbox Pro’s (back lid, front lid, outer shell, and inner shell) as well as an extra inner and outer shell.
The outer shell with supports barely fits within the 260 × 260 mm print volume, but both prints came out exceptionally well.
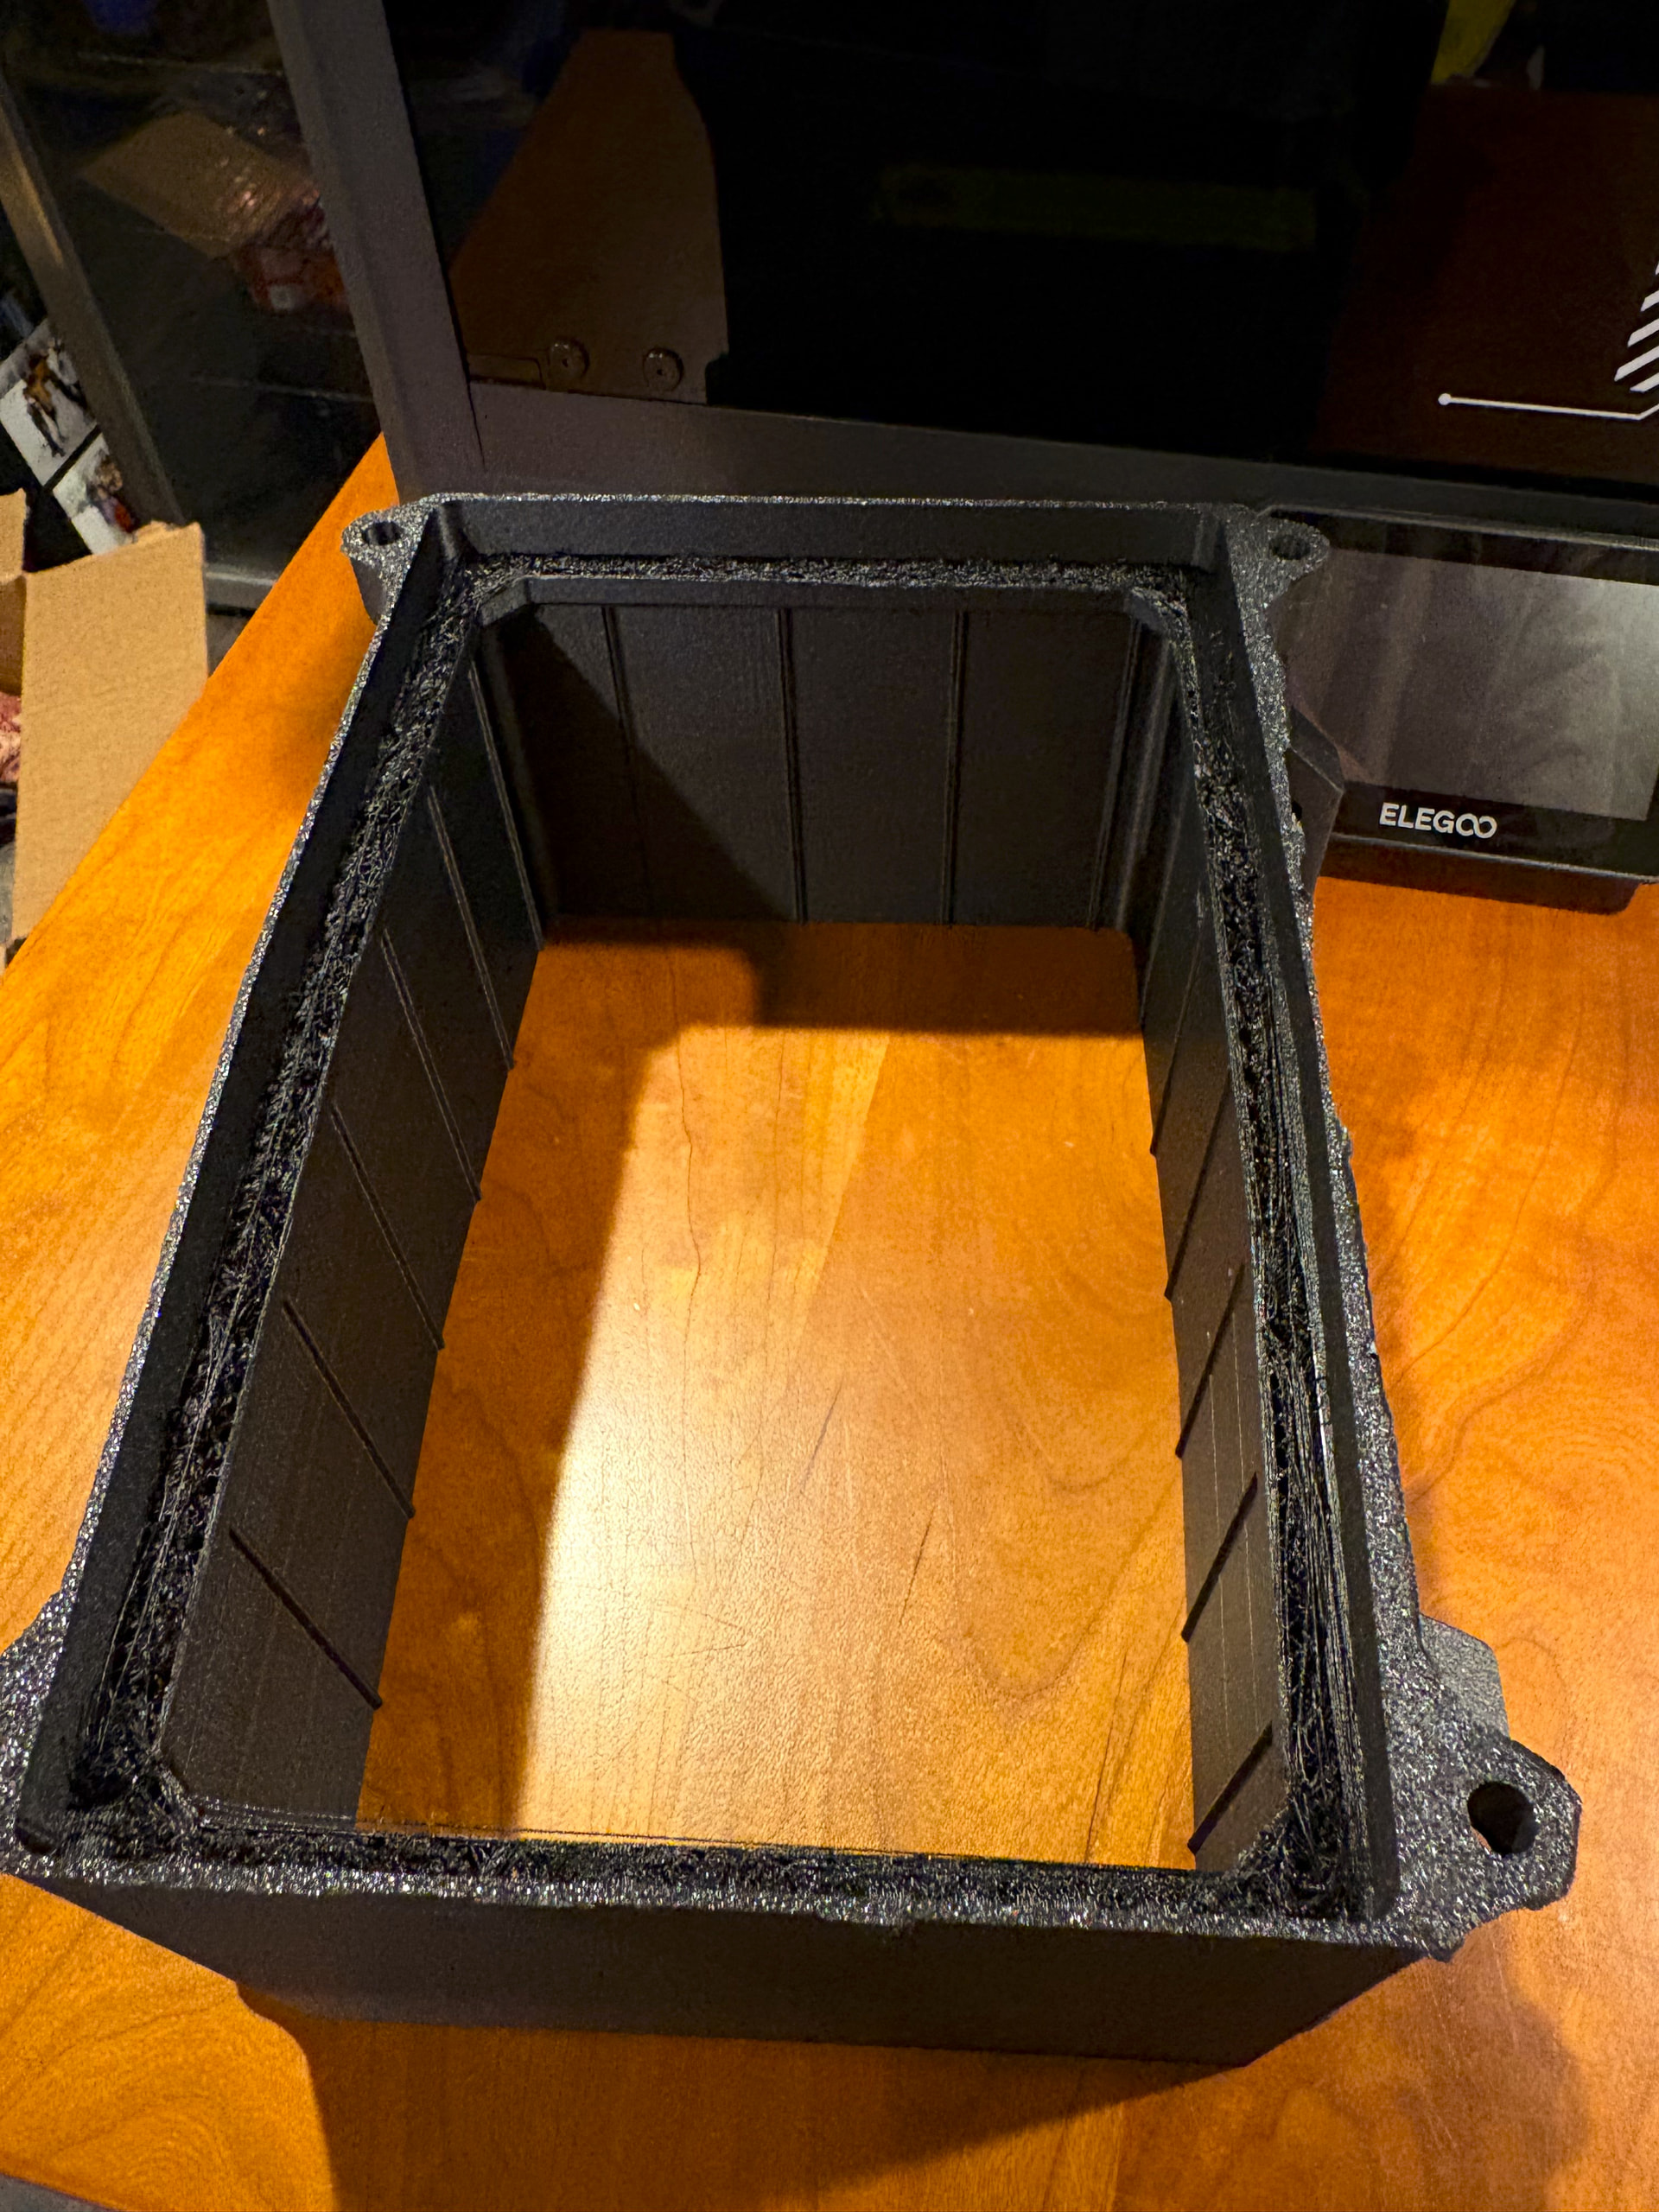
The back lid, front lid, and inner shell printed successfully without additional supports, while the outer shell has some overhanging geometry the requires support material. I attempted to print the outer shell without supports and it came out a bit messy and needed a lot of cleaning up. It could potentially still be used, but I would be concerned about the seal of the front lid.
I am currently working on dialing in the setting for printing the TPU parts using ERYONE TPU 85A. I’ve never printed with TPU before so my first attempts at prints did not turn out. I have been playing with the temperature, flow rate, speed, and infill amount. I am getting closer with my setting and should have them dialed in soon.
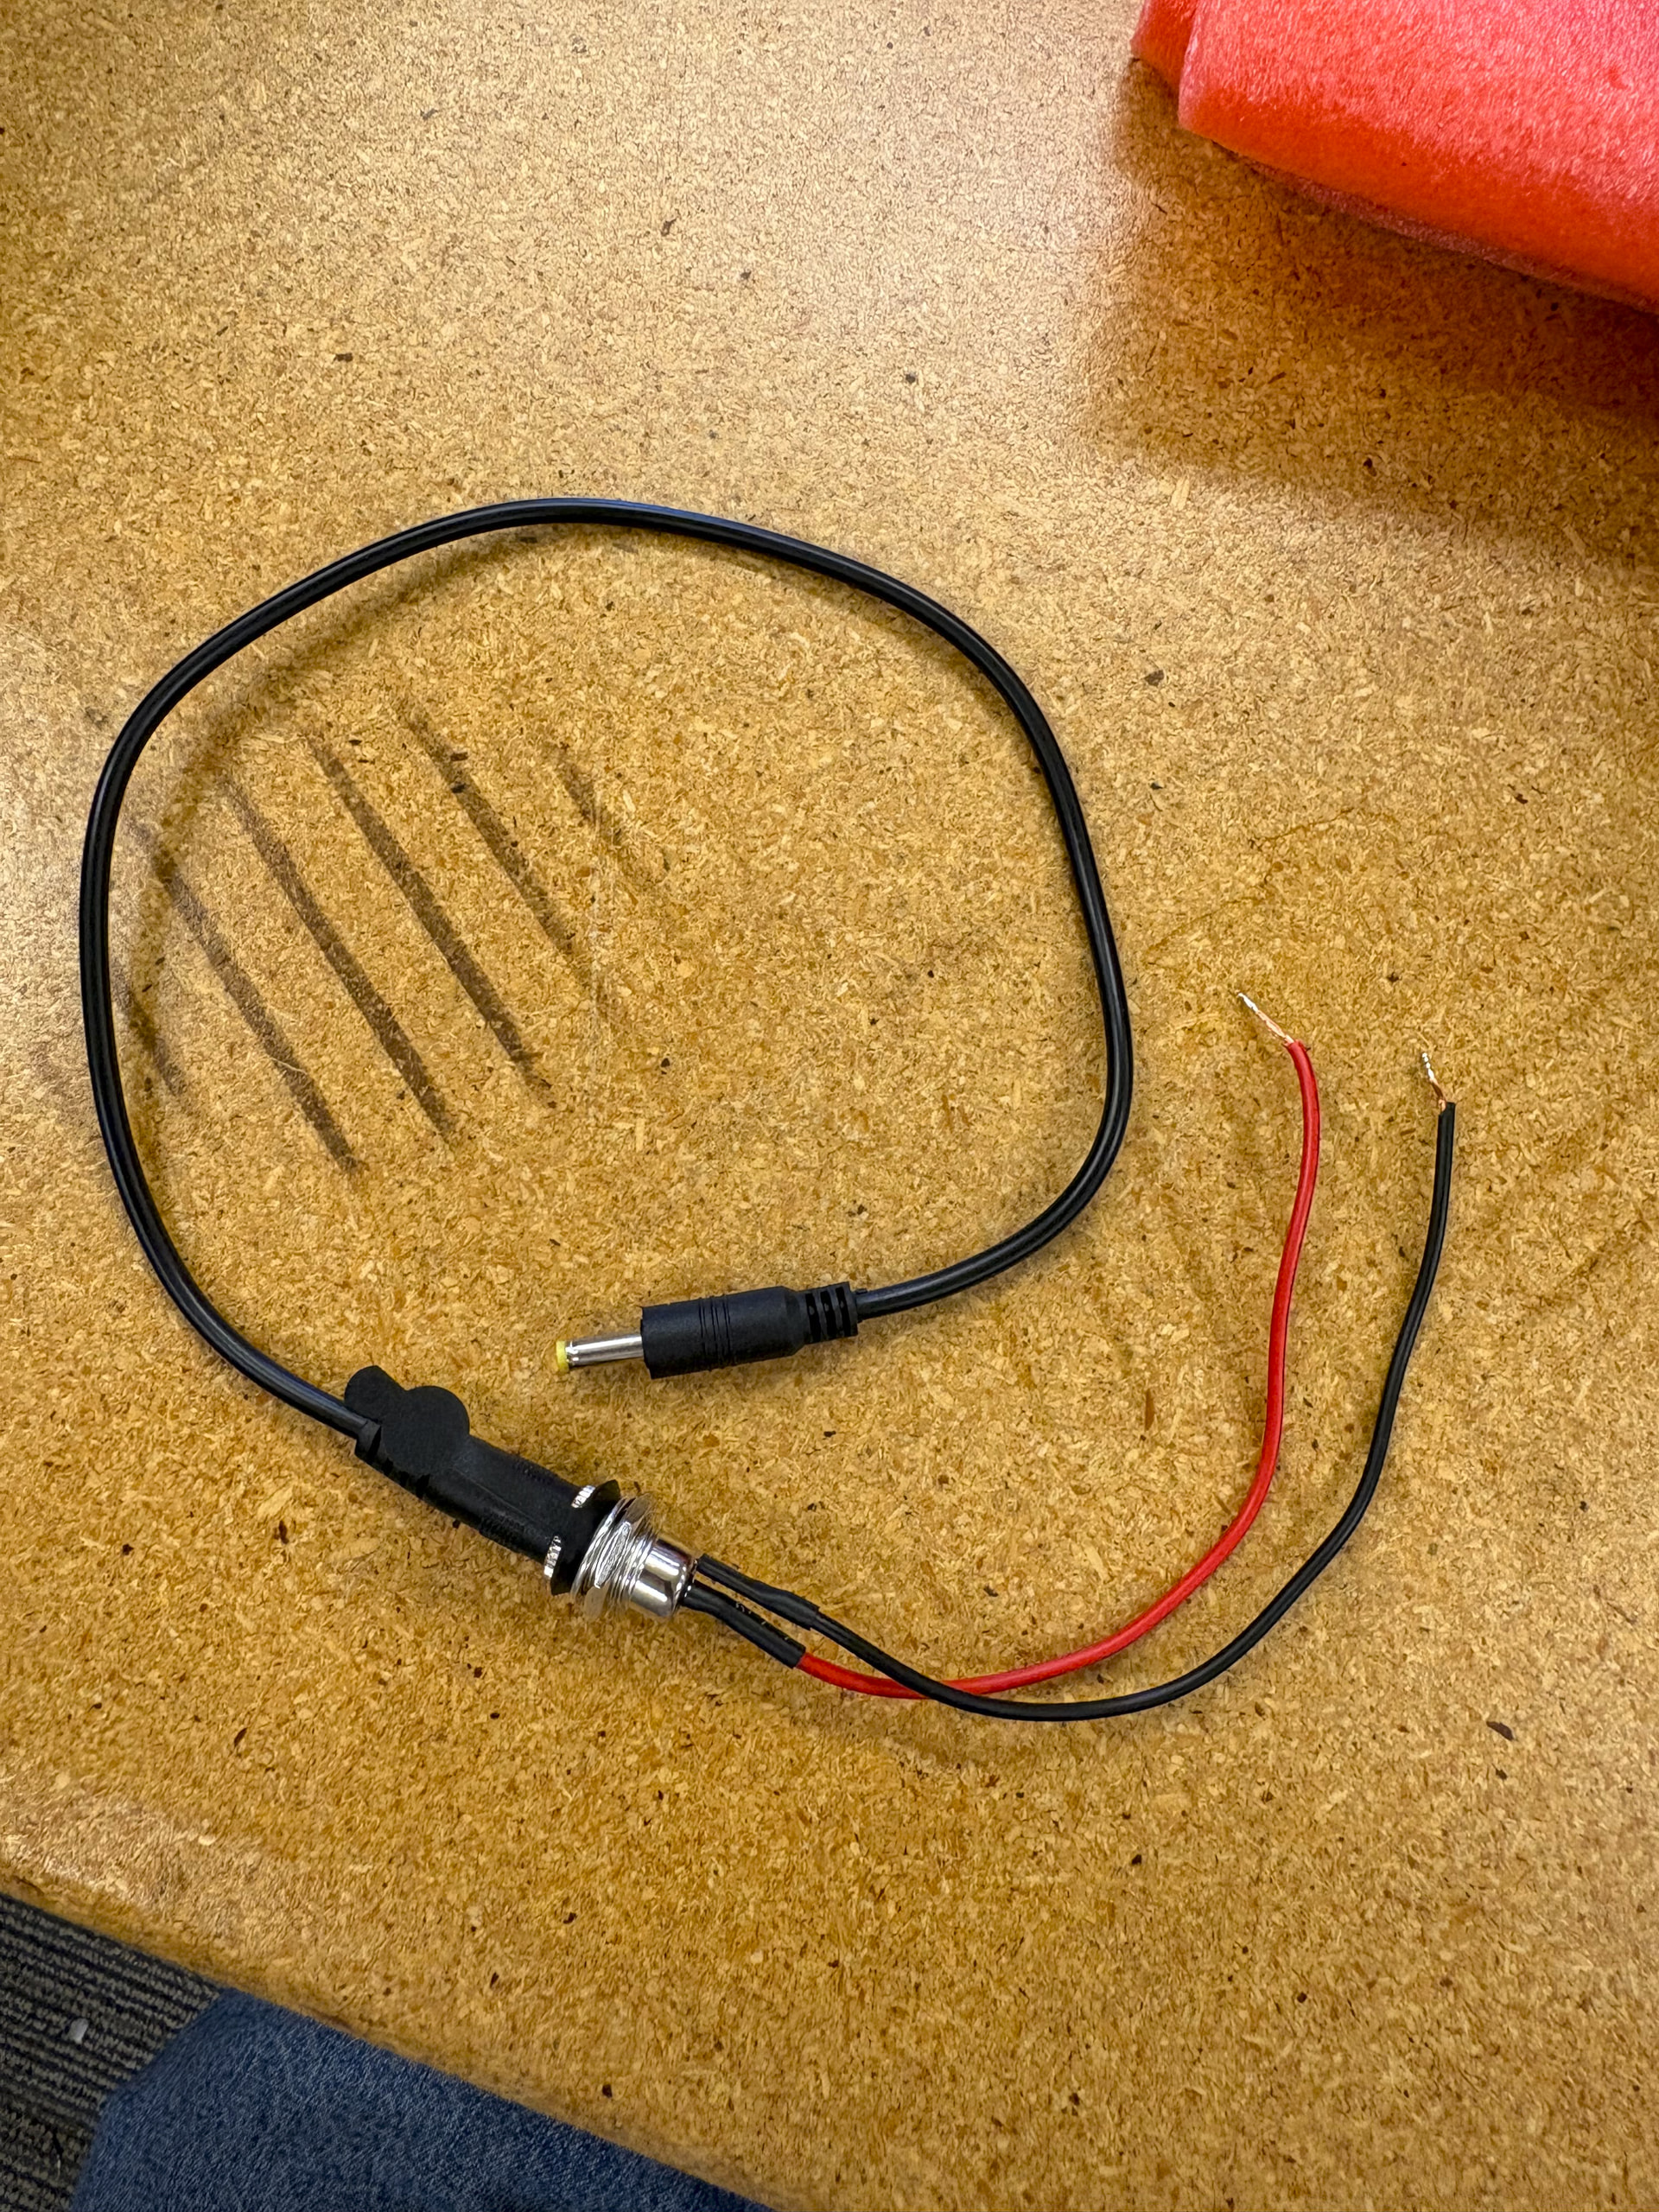
I have received a majority of the parts late last week. As I started my Mothbox assembly, I came to an unfortunate realization. Since I ordered the PB240B1battery due to the PB120B1being out of stock, I failed to notice that the 12v output port is a smaller DC4017 rather than the DC5521 size that is on the PB120B1 battery. The DC barrel jack cables I ordered from the BOM are too large for that port so I am planning on ordering the correct size (or taking suggestions on a workaround).
Wow you weren’t kidding! That guy really knows his way around a Mothbox.
The PCB accepts a range from 9-36V, so the adapter jacks the battery came with can be used to accept the 24V output of my battery. Thanks!
Andy was nice enough to lend me a new 5.0.5 PCB and 2 mothbeams for this project. But I decided to go through the process of “ordering” one to audit the process.
The only part that I am still struggling with is getting the KiCAD JLCPCB plugin to work for editing the KiCAD file. I followed the download instructions for Windows and everything appears to be set up correctly. I did have to play around with the path configuration under the preference tab to properly generate the production files.
But clicking through generated the gerber, BOM and CPL files I needed. Not sure if this is always the case.
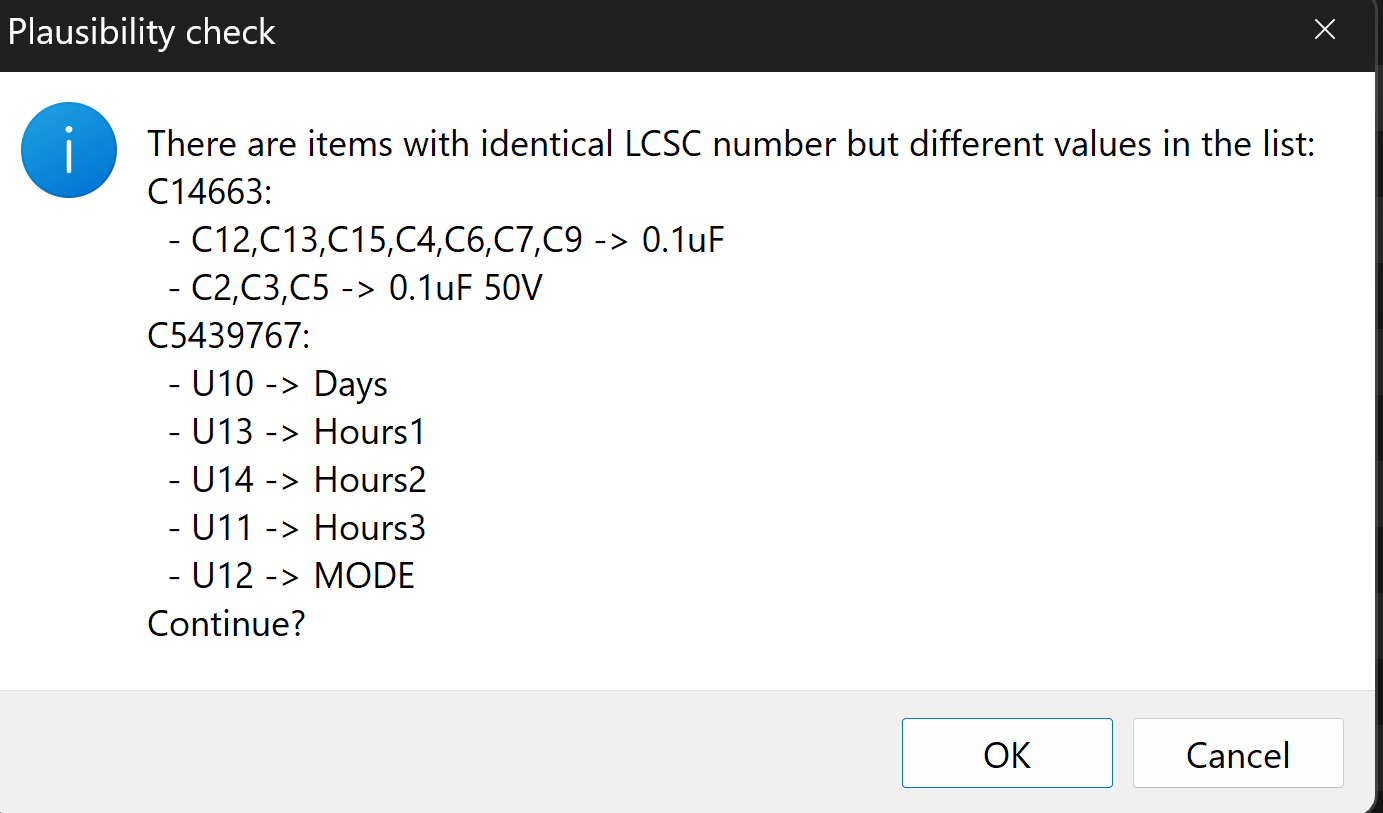
The instructions walked through the process on the JLCPCB site quite well. I had to replace the same parts on on the PBC that were outlined on the mothbox page as well as part C1542495. I found a suitable replacement for this SMBus: C561273using the instructions on the mothbox page.
Seems we are embarking on the same replication. Just ordered some boards from JLCPCB. Got the error described in the instructions and one PCA9555PW missing, but simply exchangeable with the PCA9555PWR.
Im in the center of Europe ( The Netherlands), and the battery and the arducam will be “difficult” to find, or very expensive, so I’ll most probably check for some compatible stuff.
everyone in europe keeps telling me that the batteries are hard to find, but i just easily got 20 to berlin and 30 heading to aarhus right now
I have a contact at the battery factory that can ship the batteries anywhere, with pretty low minimum order quantities, so just let me know if you need like 4 or more, i can connect you up with the battery folks and they are happy to send them anywhere quickly! (and cheaply!)
didn’t manage to find them locally. I can probably order them from outside EU, but that will add import taxes on the bill. Are those not just 6 18650 batteries?
It’s surprising how cheap the batteries come when you order them from the factory. the group in denmark just got their batteries for $58 USD including shipping and tariffs.
we made the mothbox so that it can accept batteries 9-36 volts, so whatever you want to hook up is good. the talentcell i think is more like 14 18650 batteries i think
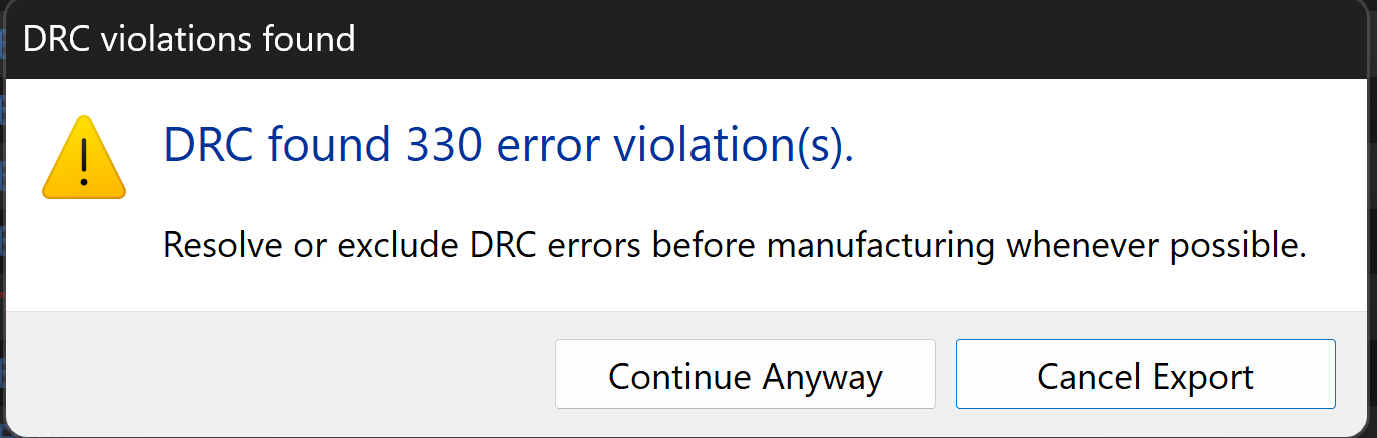
interesting the DRC got so grumpy, it gave 0 errors on mine! maybe something didn’t load properly!
Quite possible. I went back though the JLCPCB process using the jlcpcb files on the Github repo. I also got no errors but the final products seem to be the same as the ones I created.
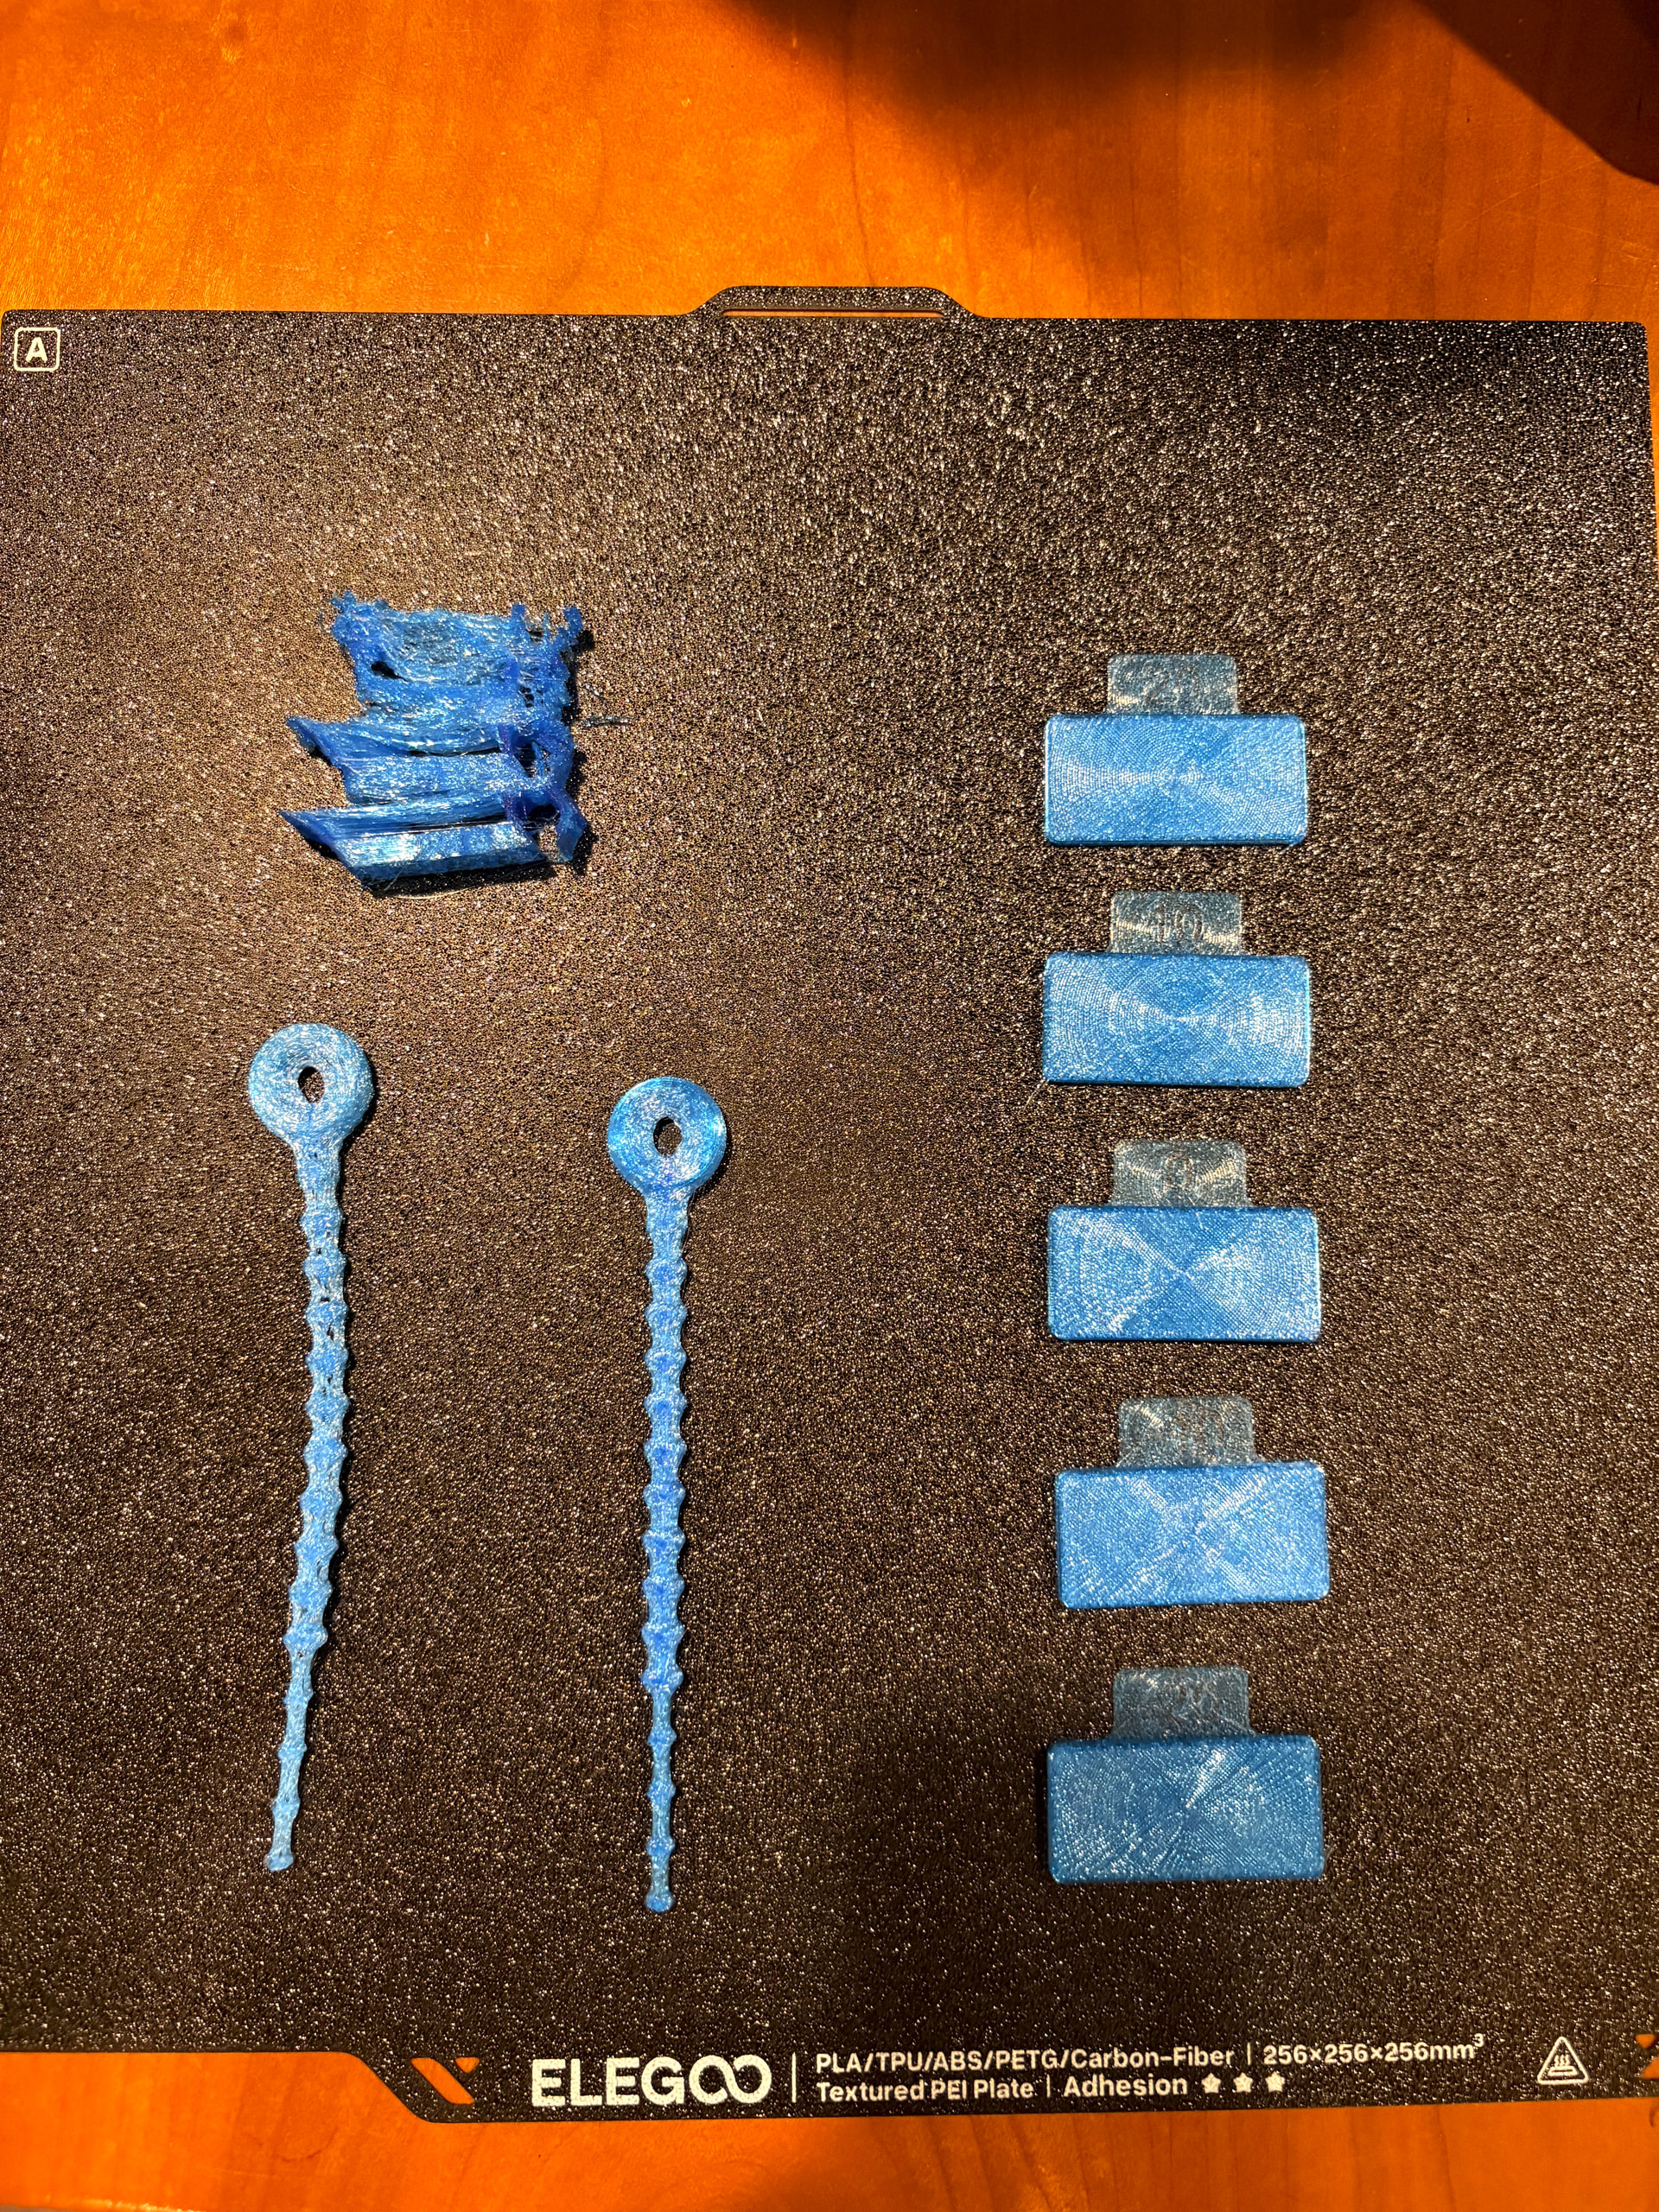
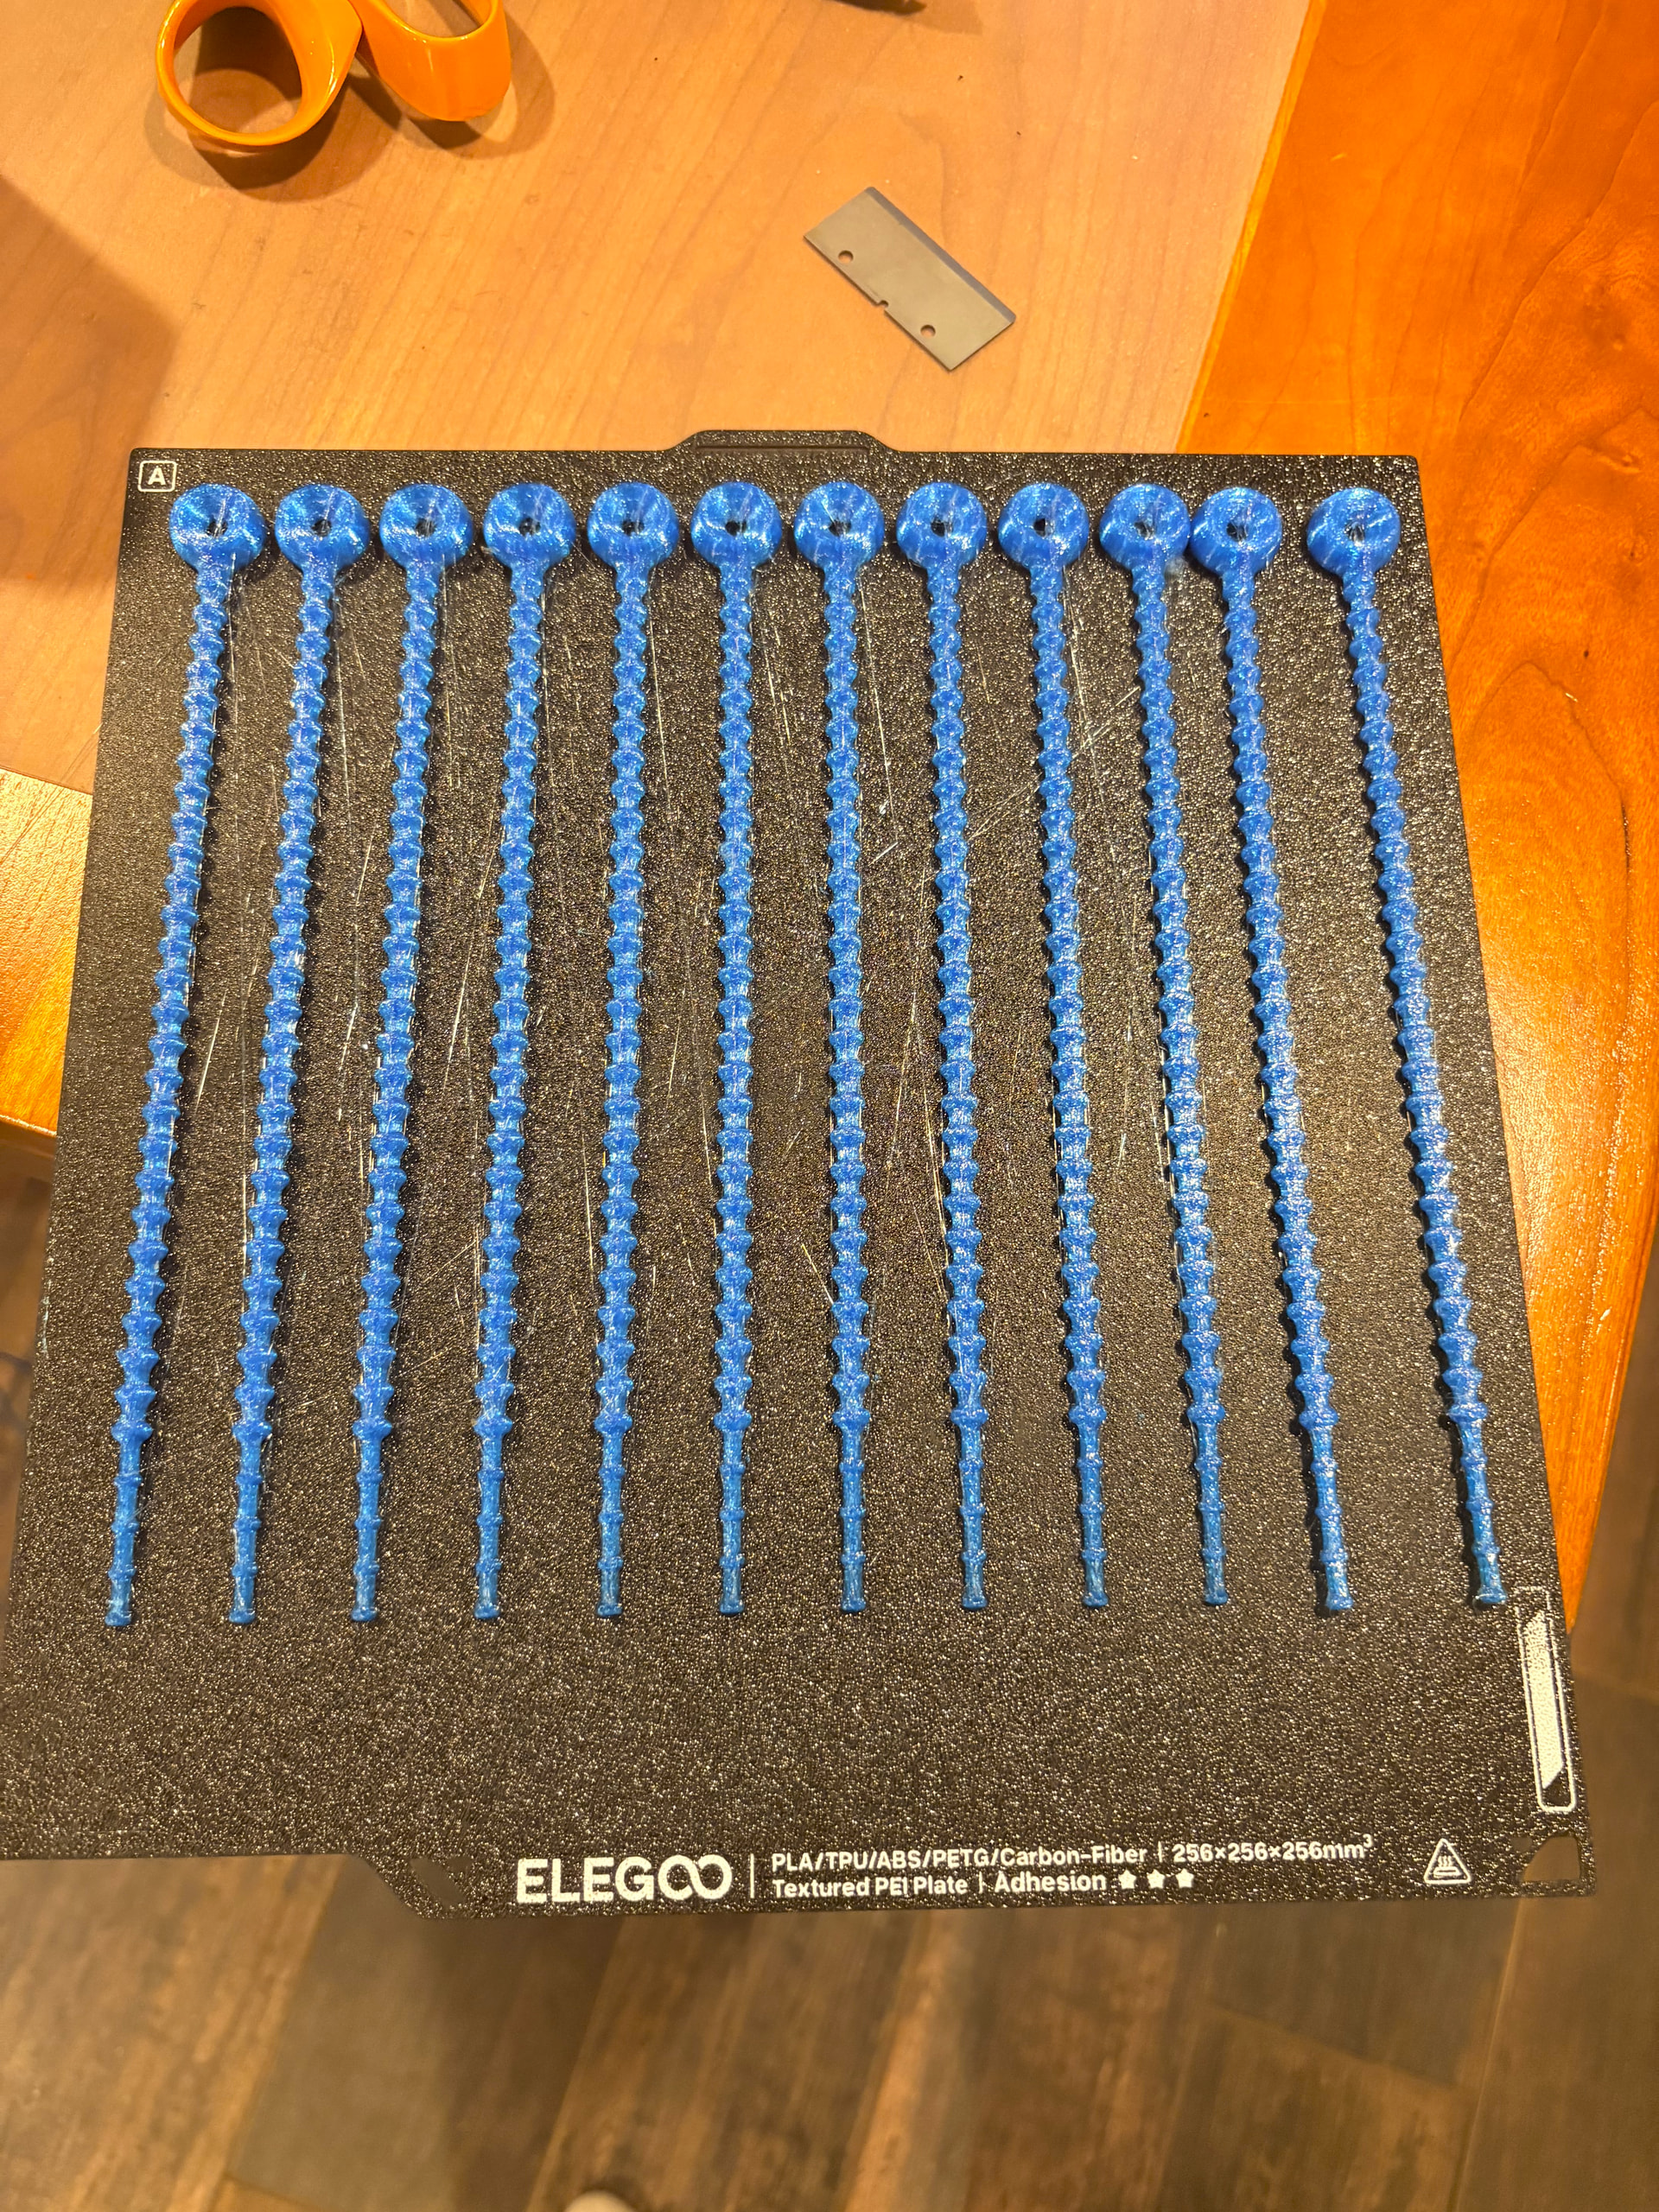
TPU parts are looking good! Turns out the main issue was the extruding gear wasn’t strong enough to over come the elasticity and back pressure of a full spool of TPU. I tried to use a spool holder but I was still unable to let the printer run by itself. I ended up manually feeding the TPU by letting out enough slack to finish each print. I was cleaned the parts up with a razor blade and a lighter.
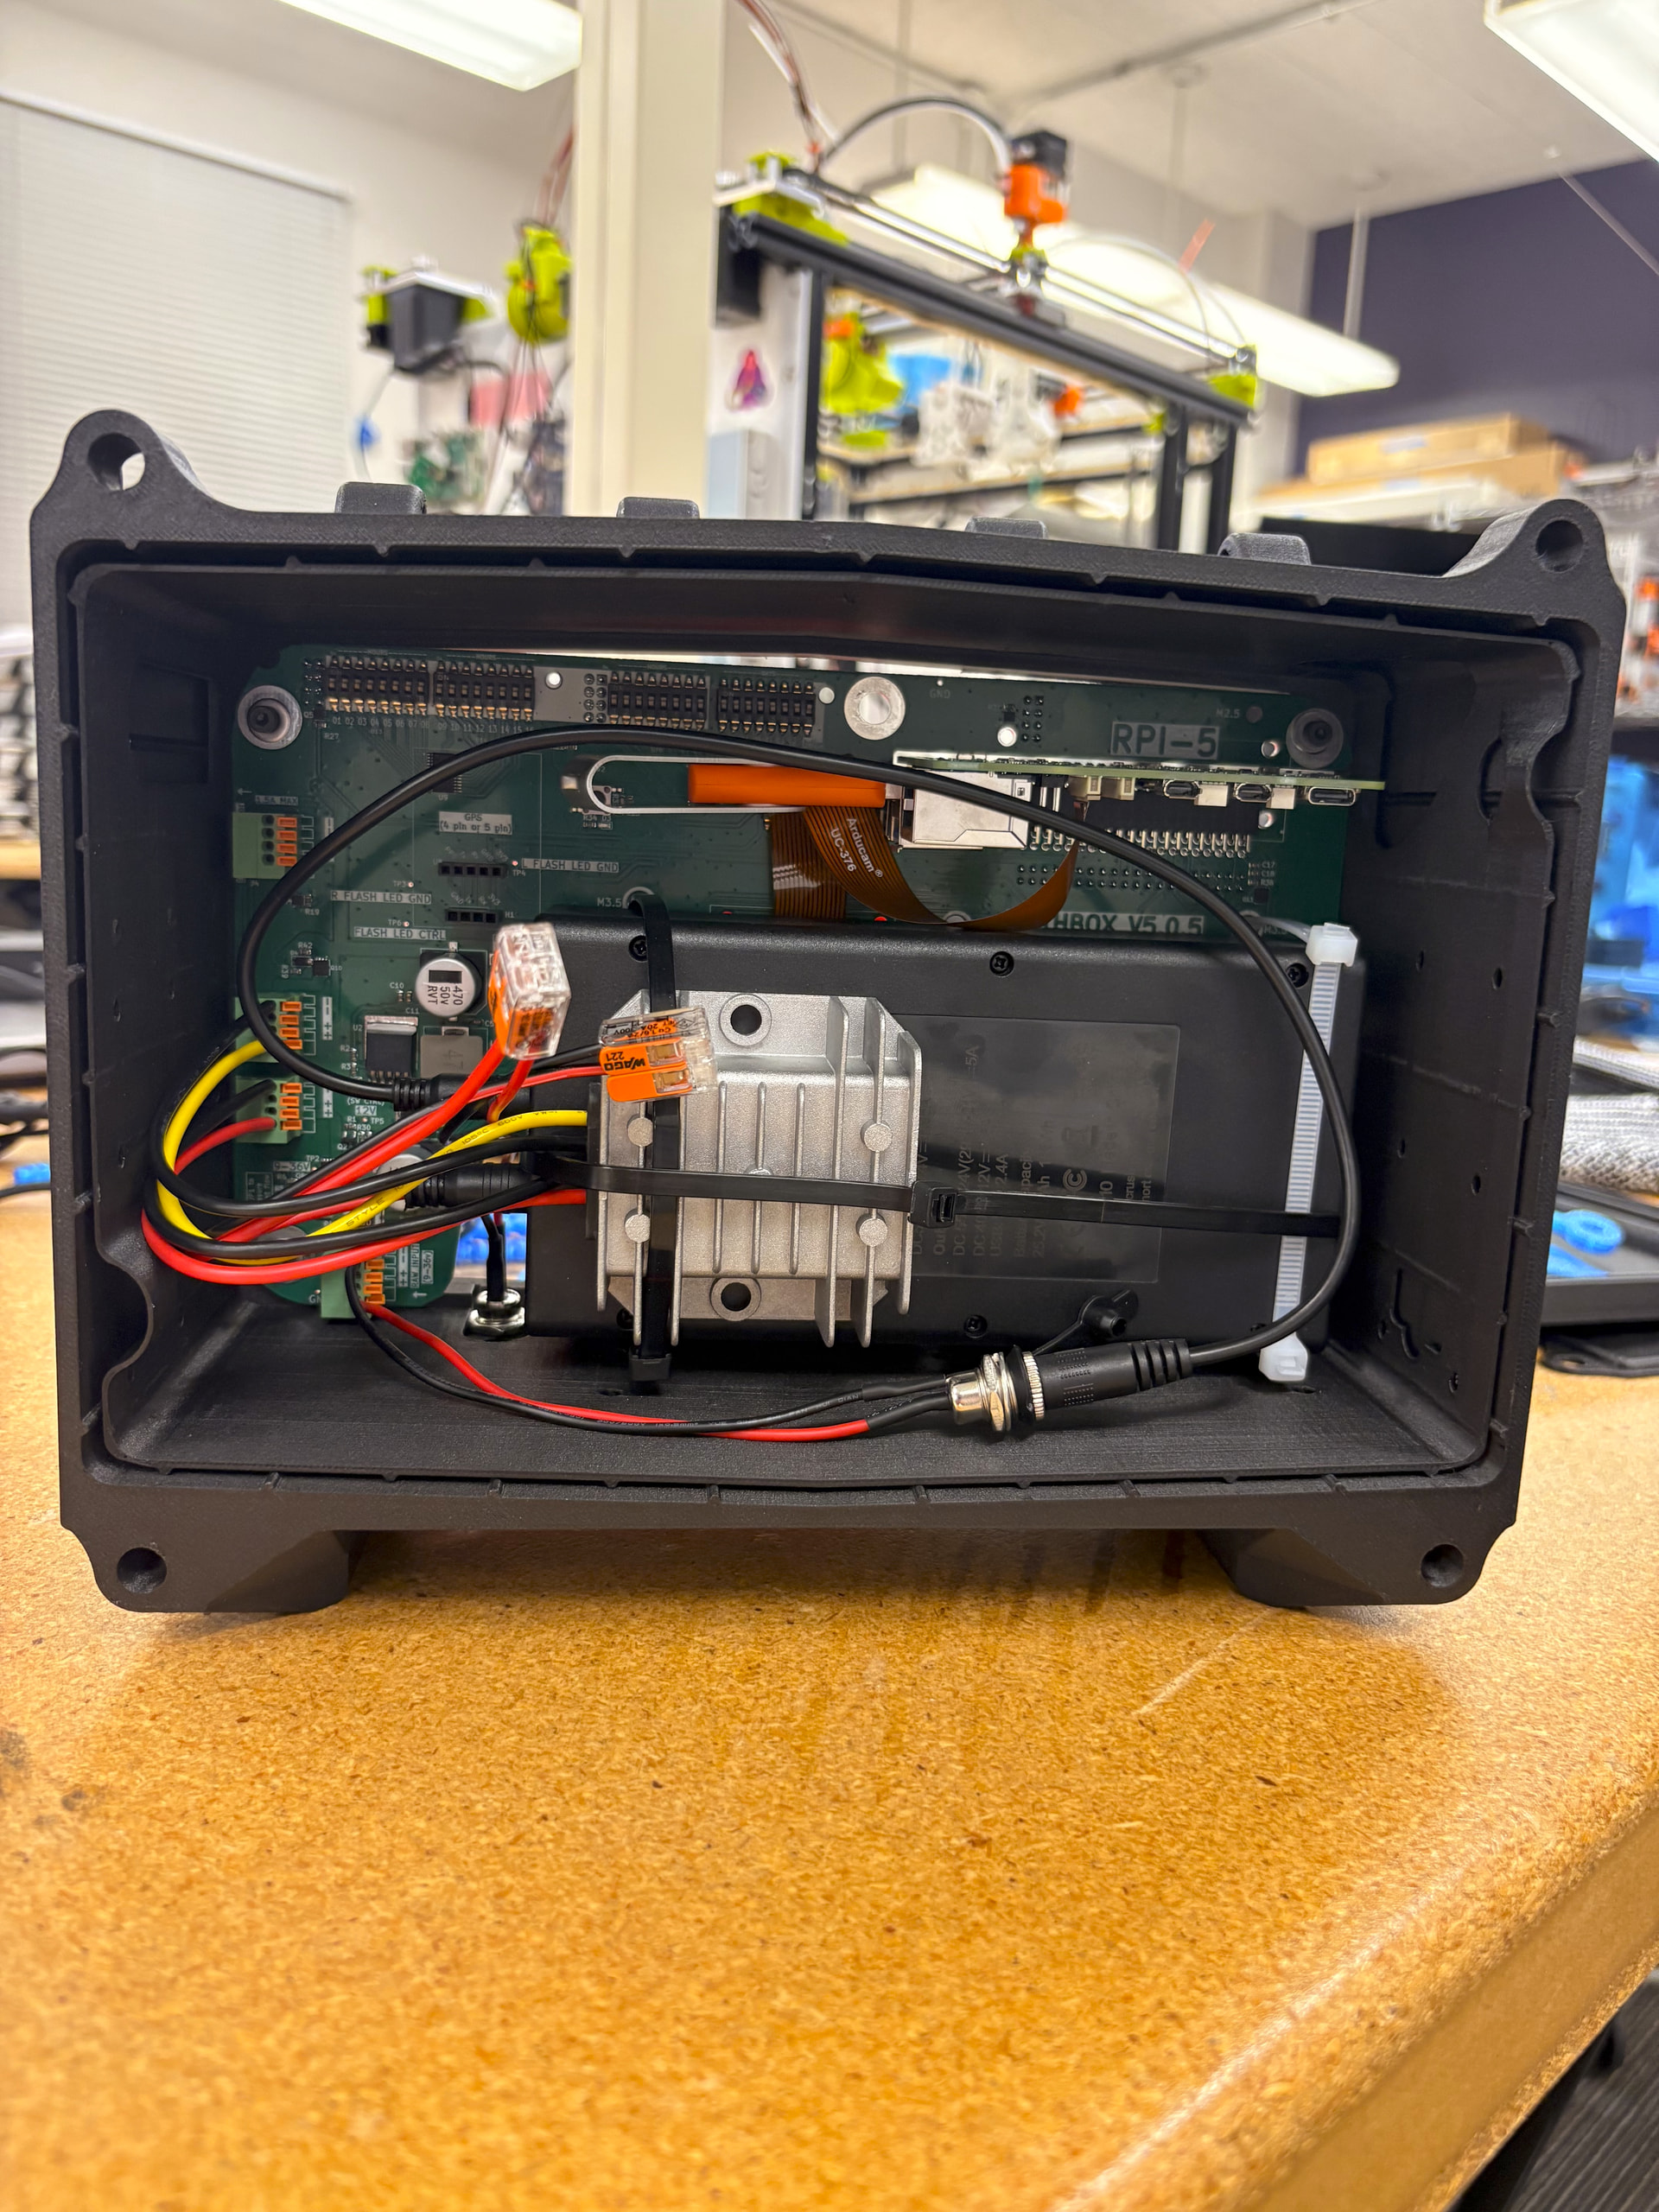
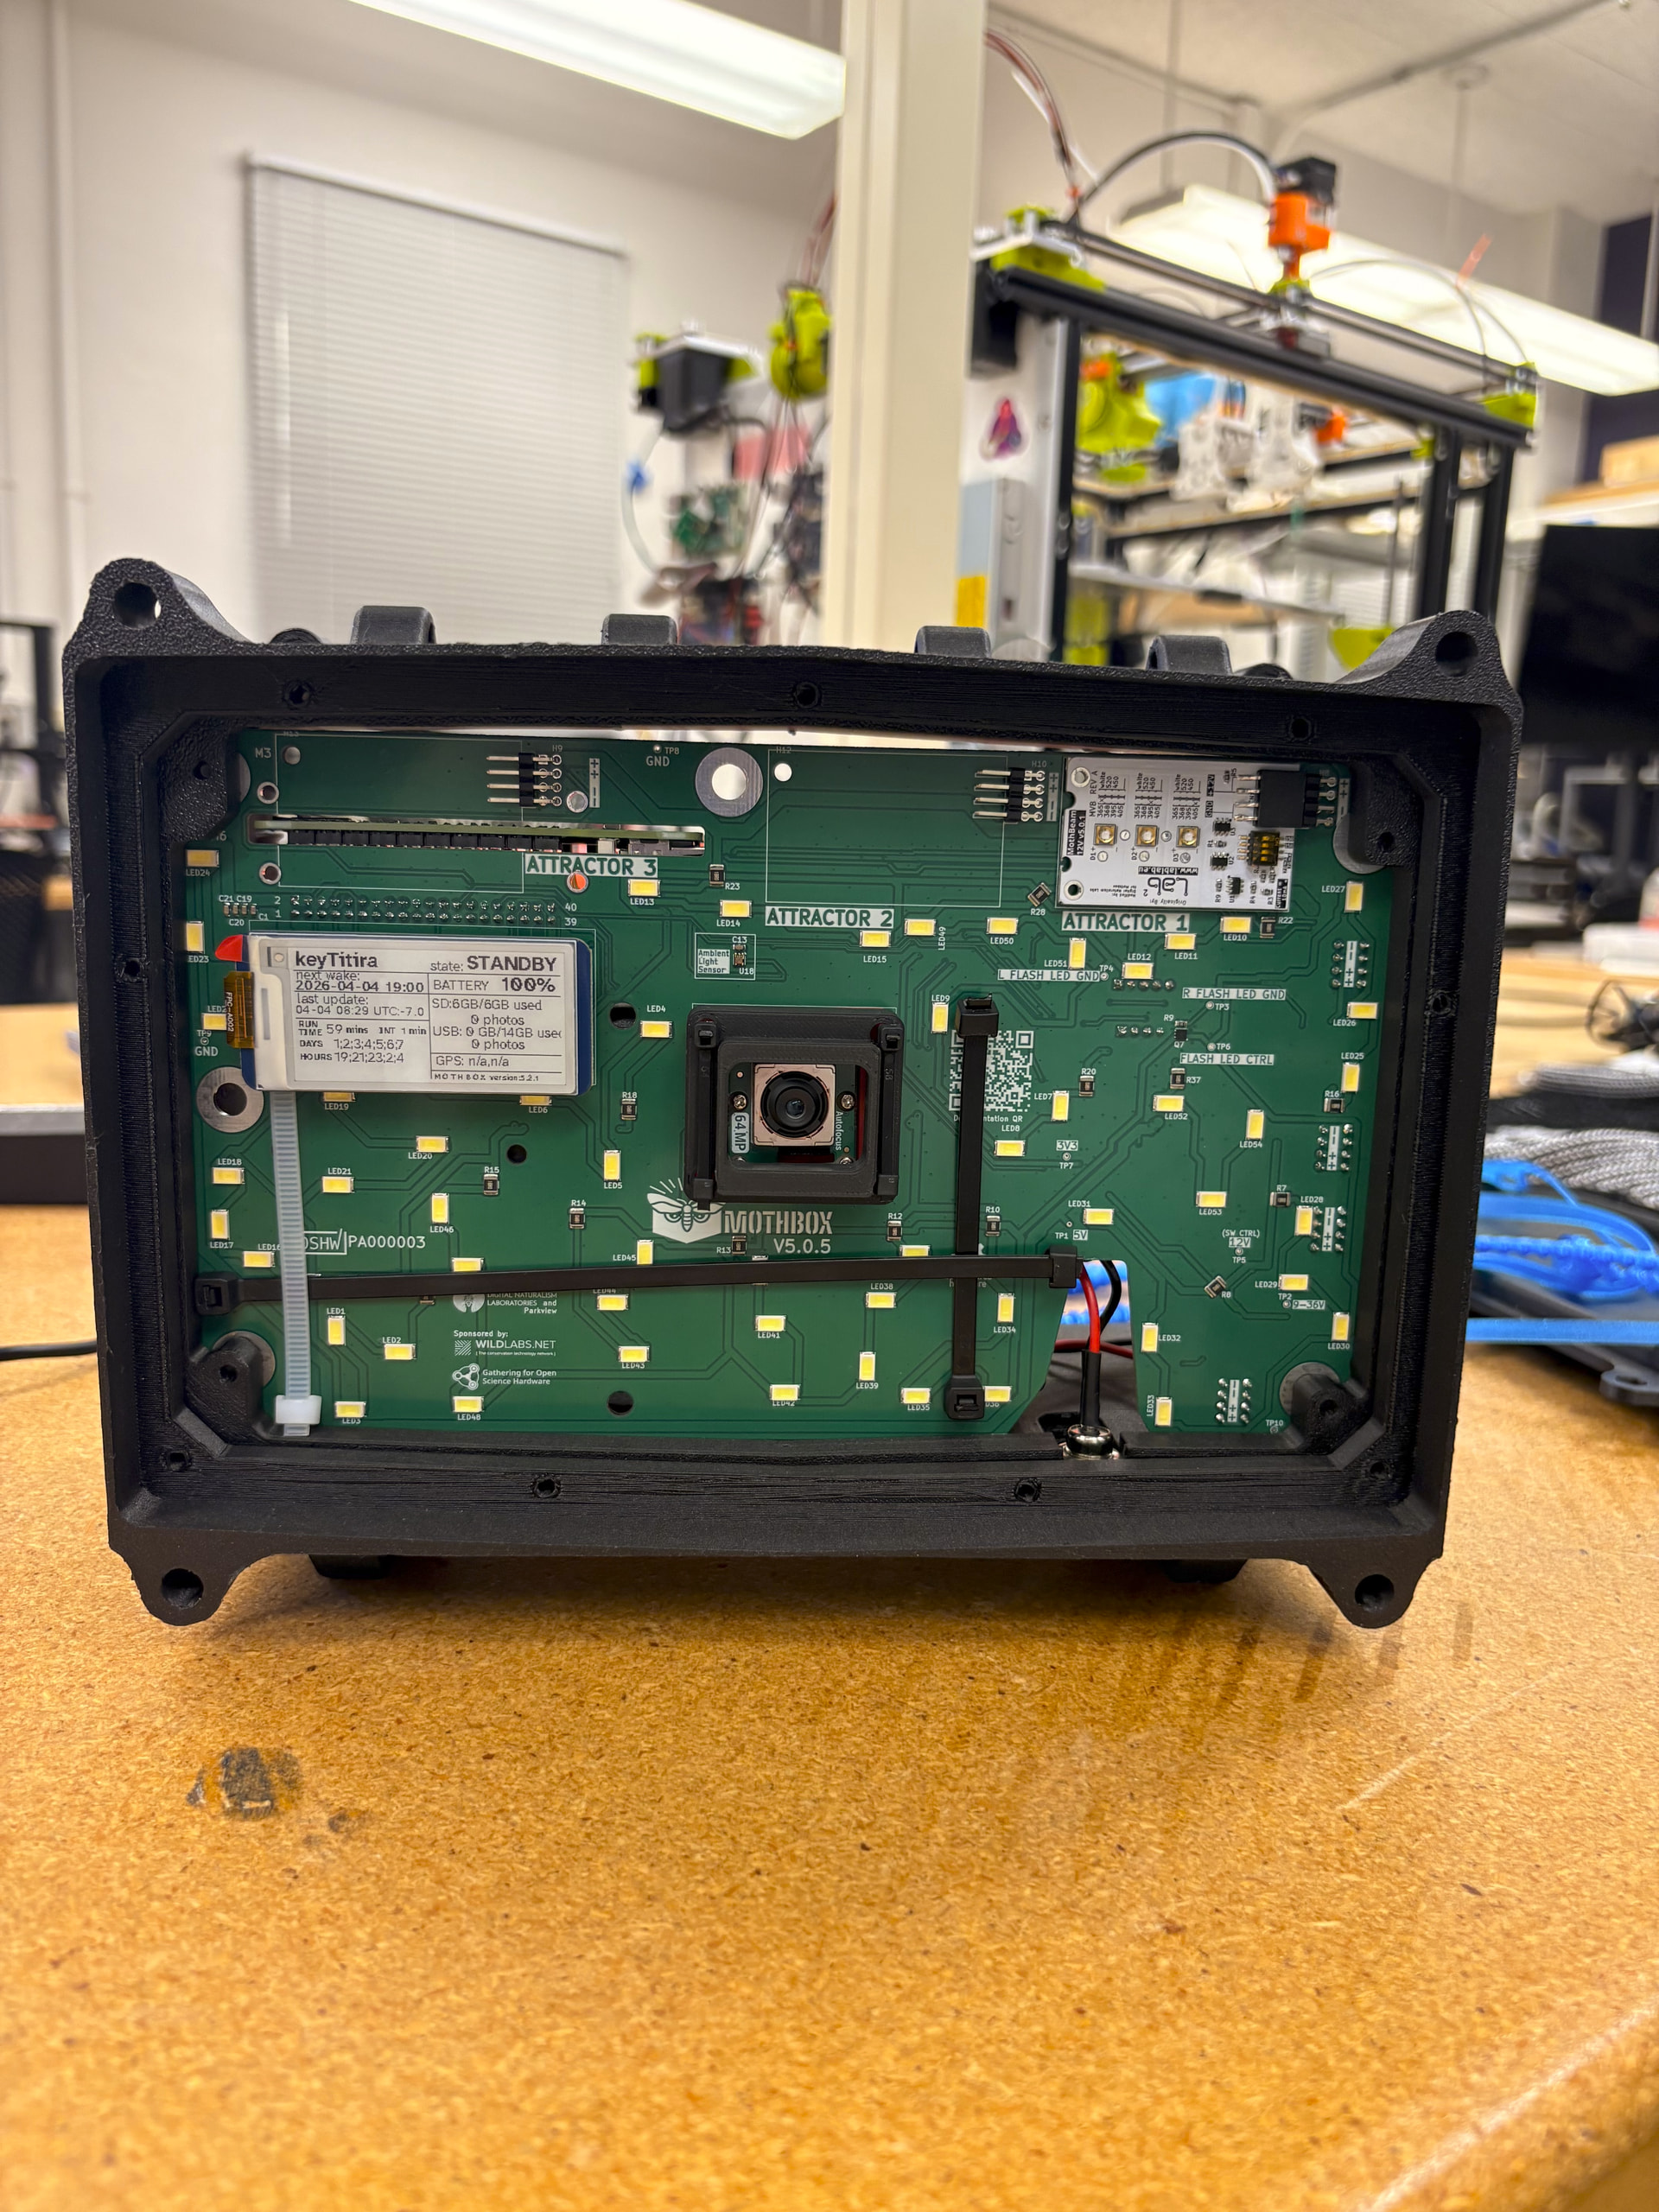
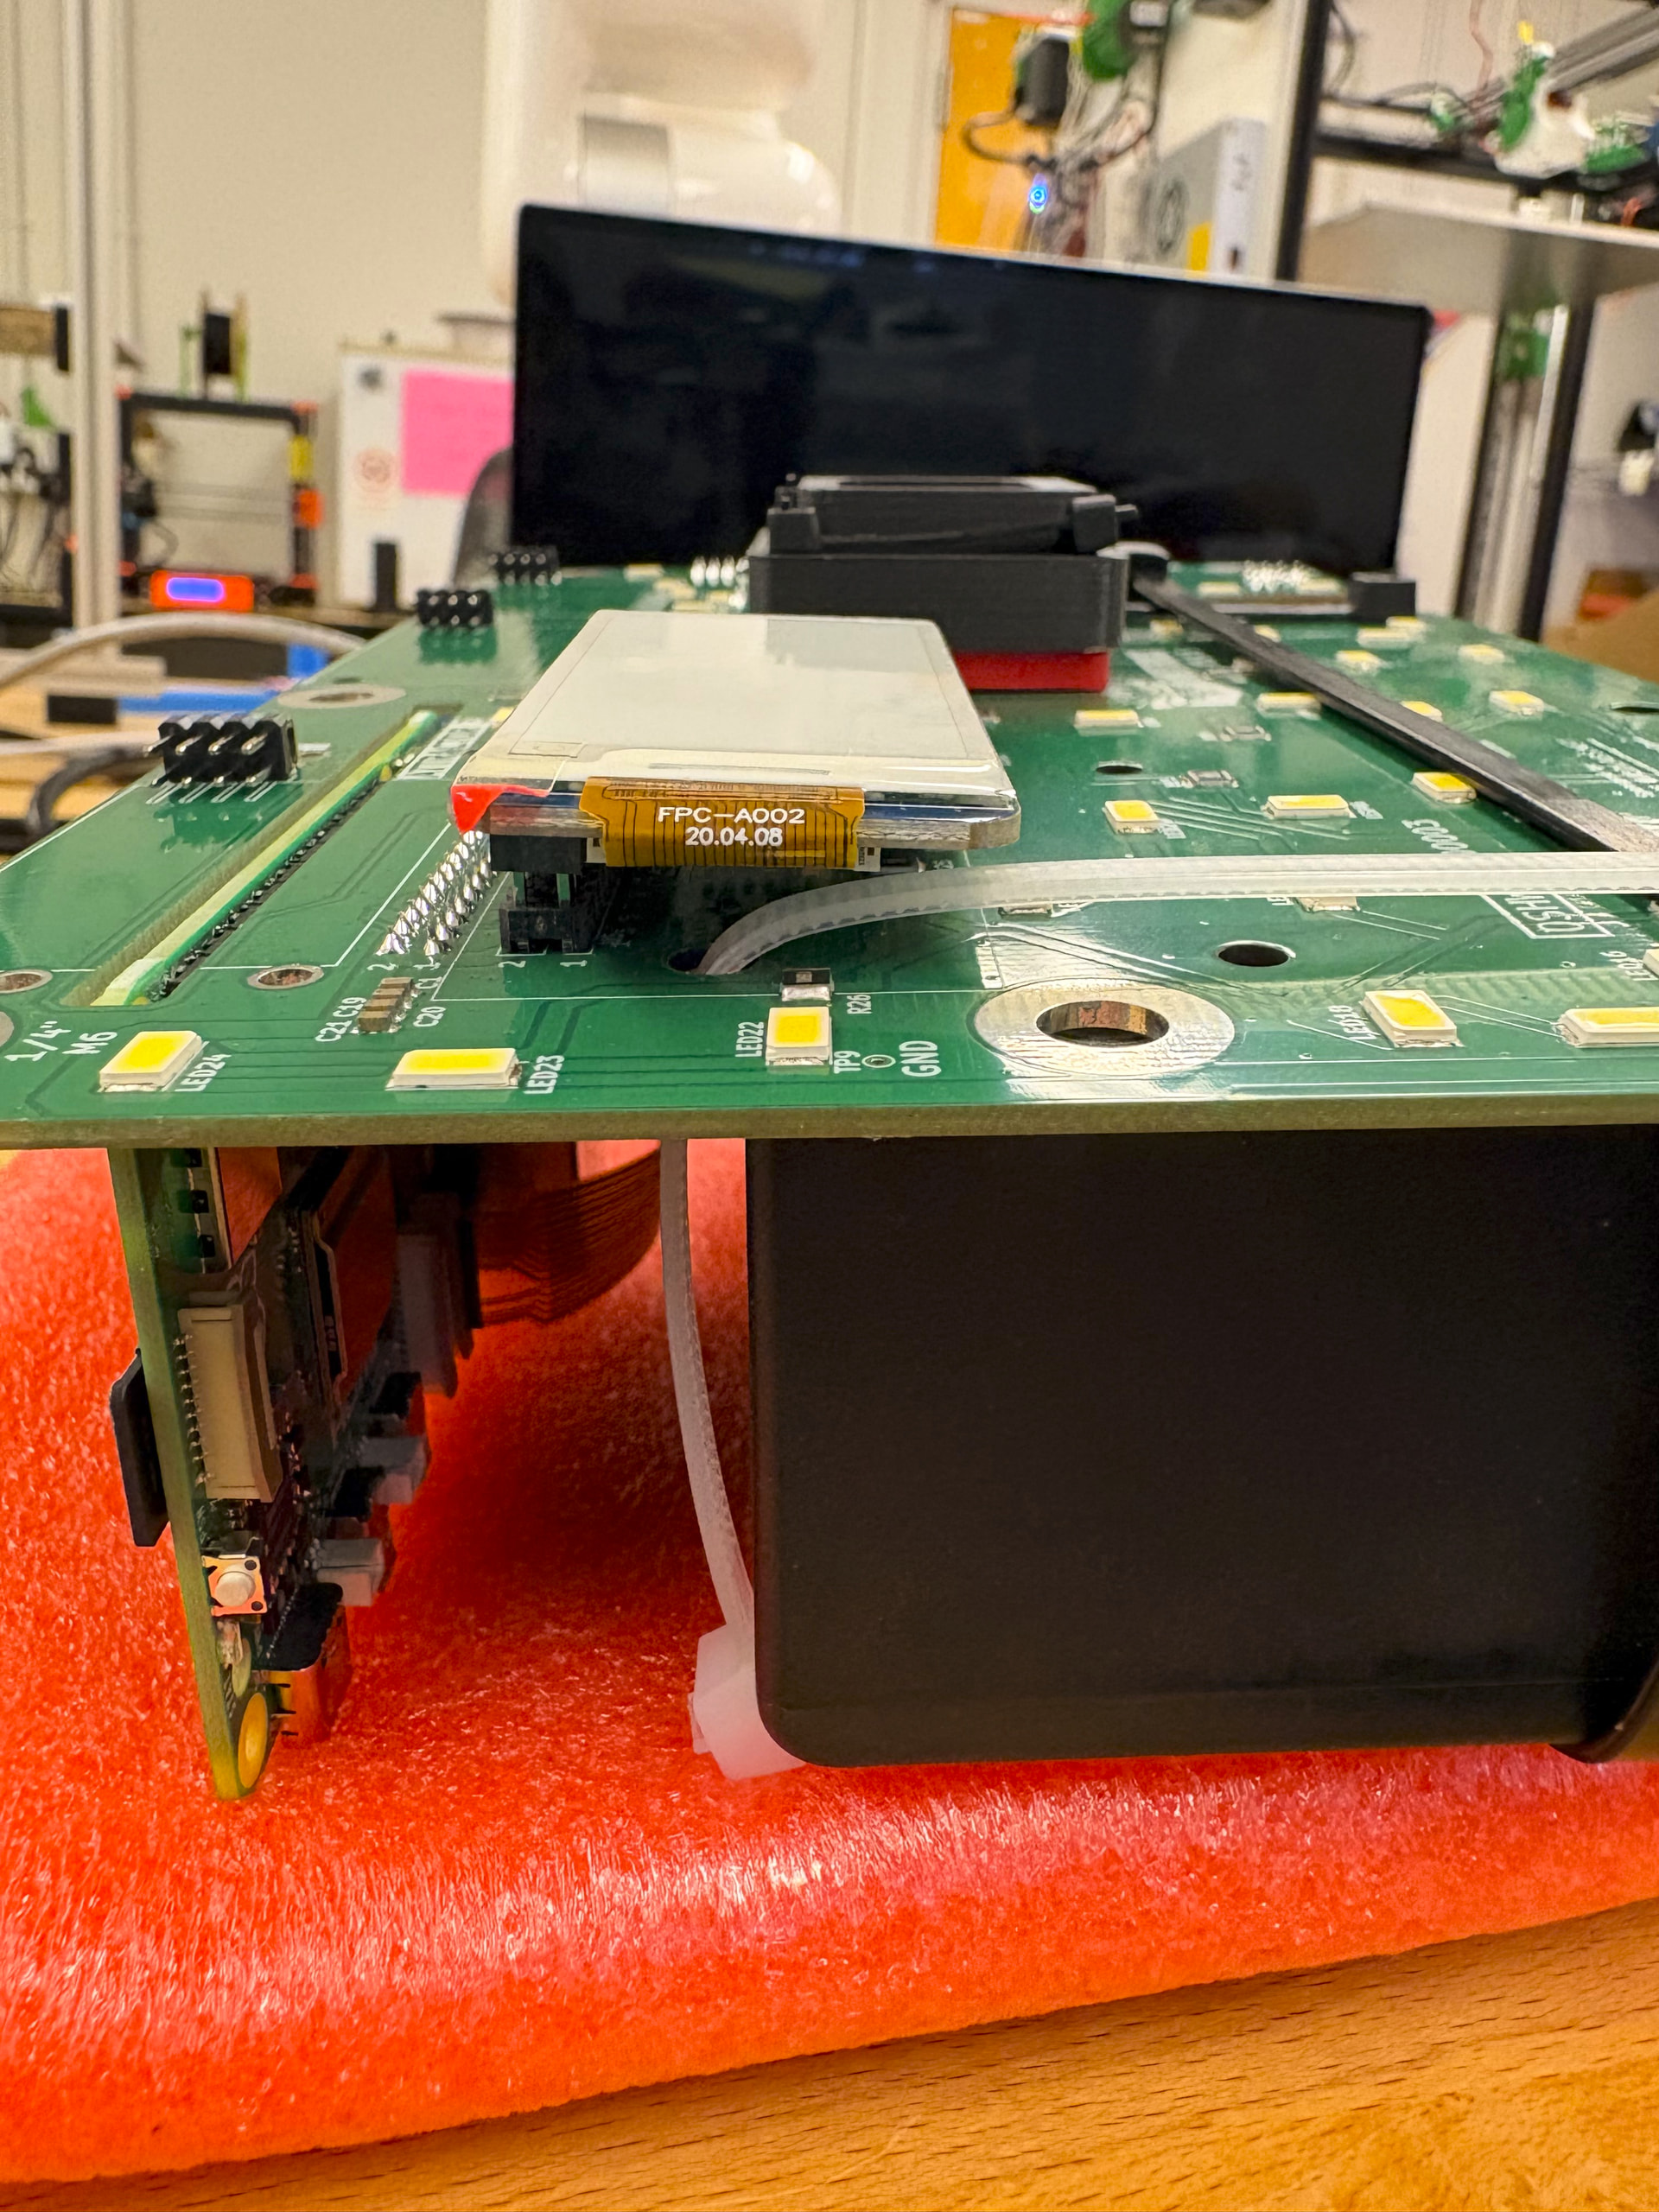
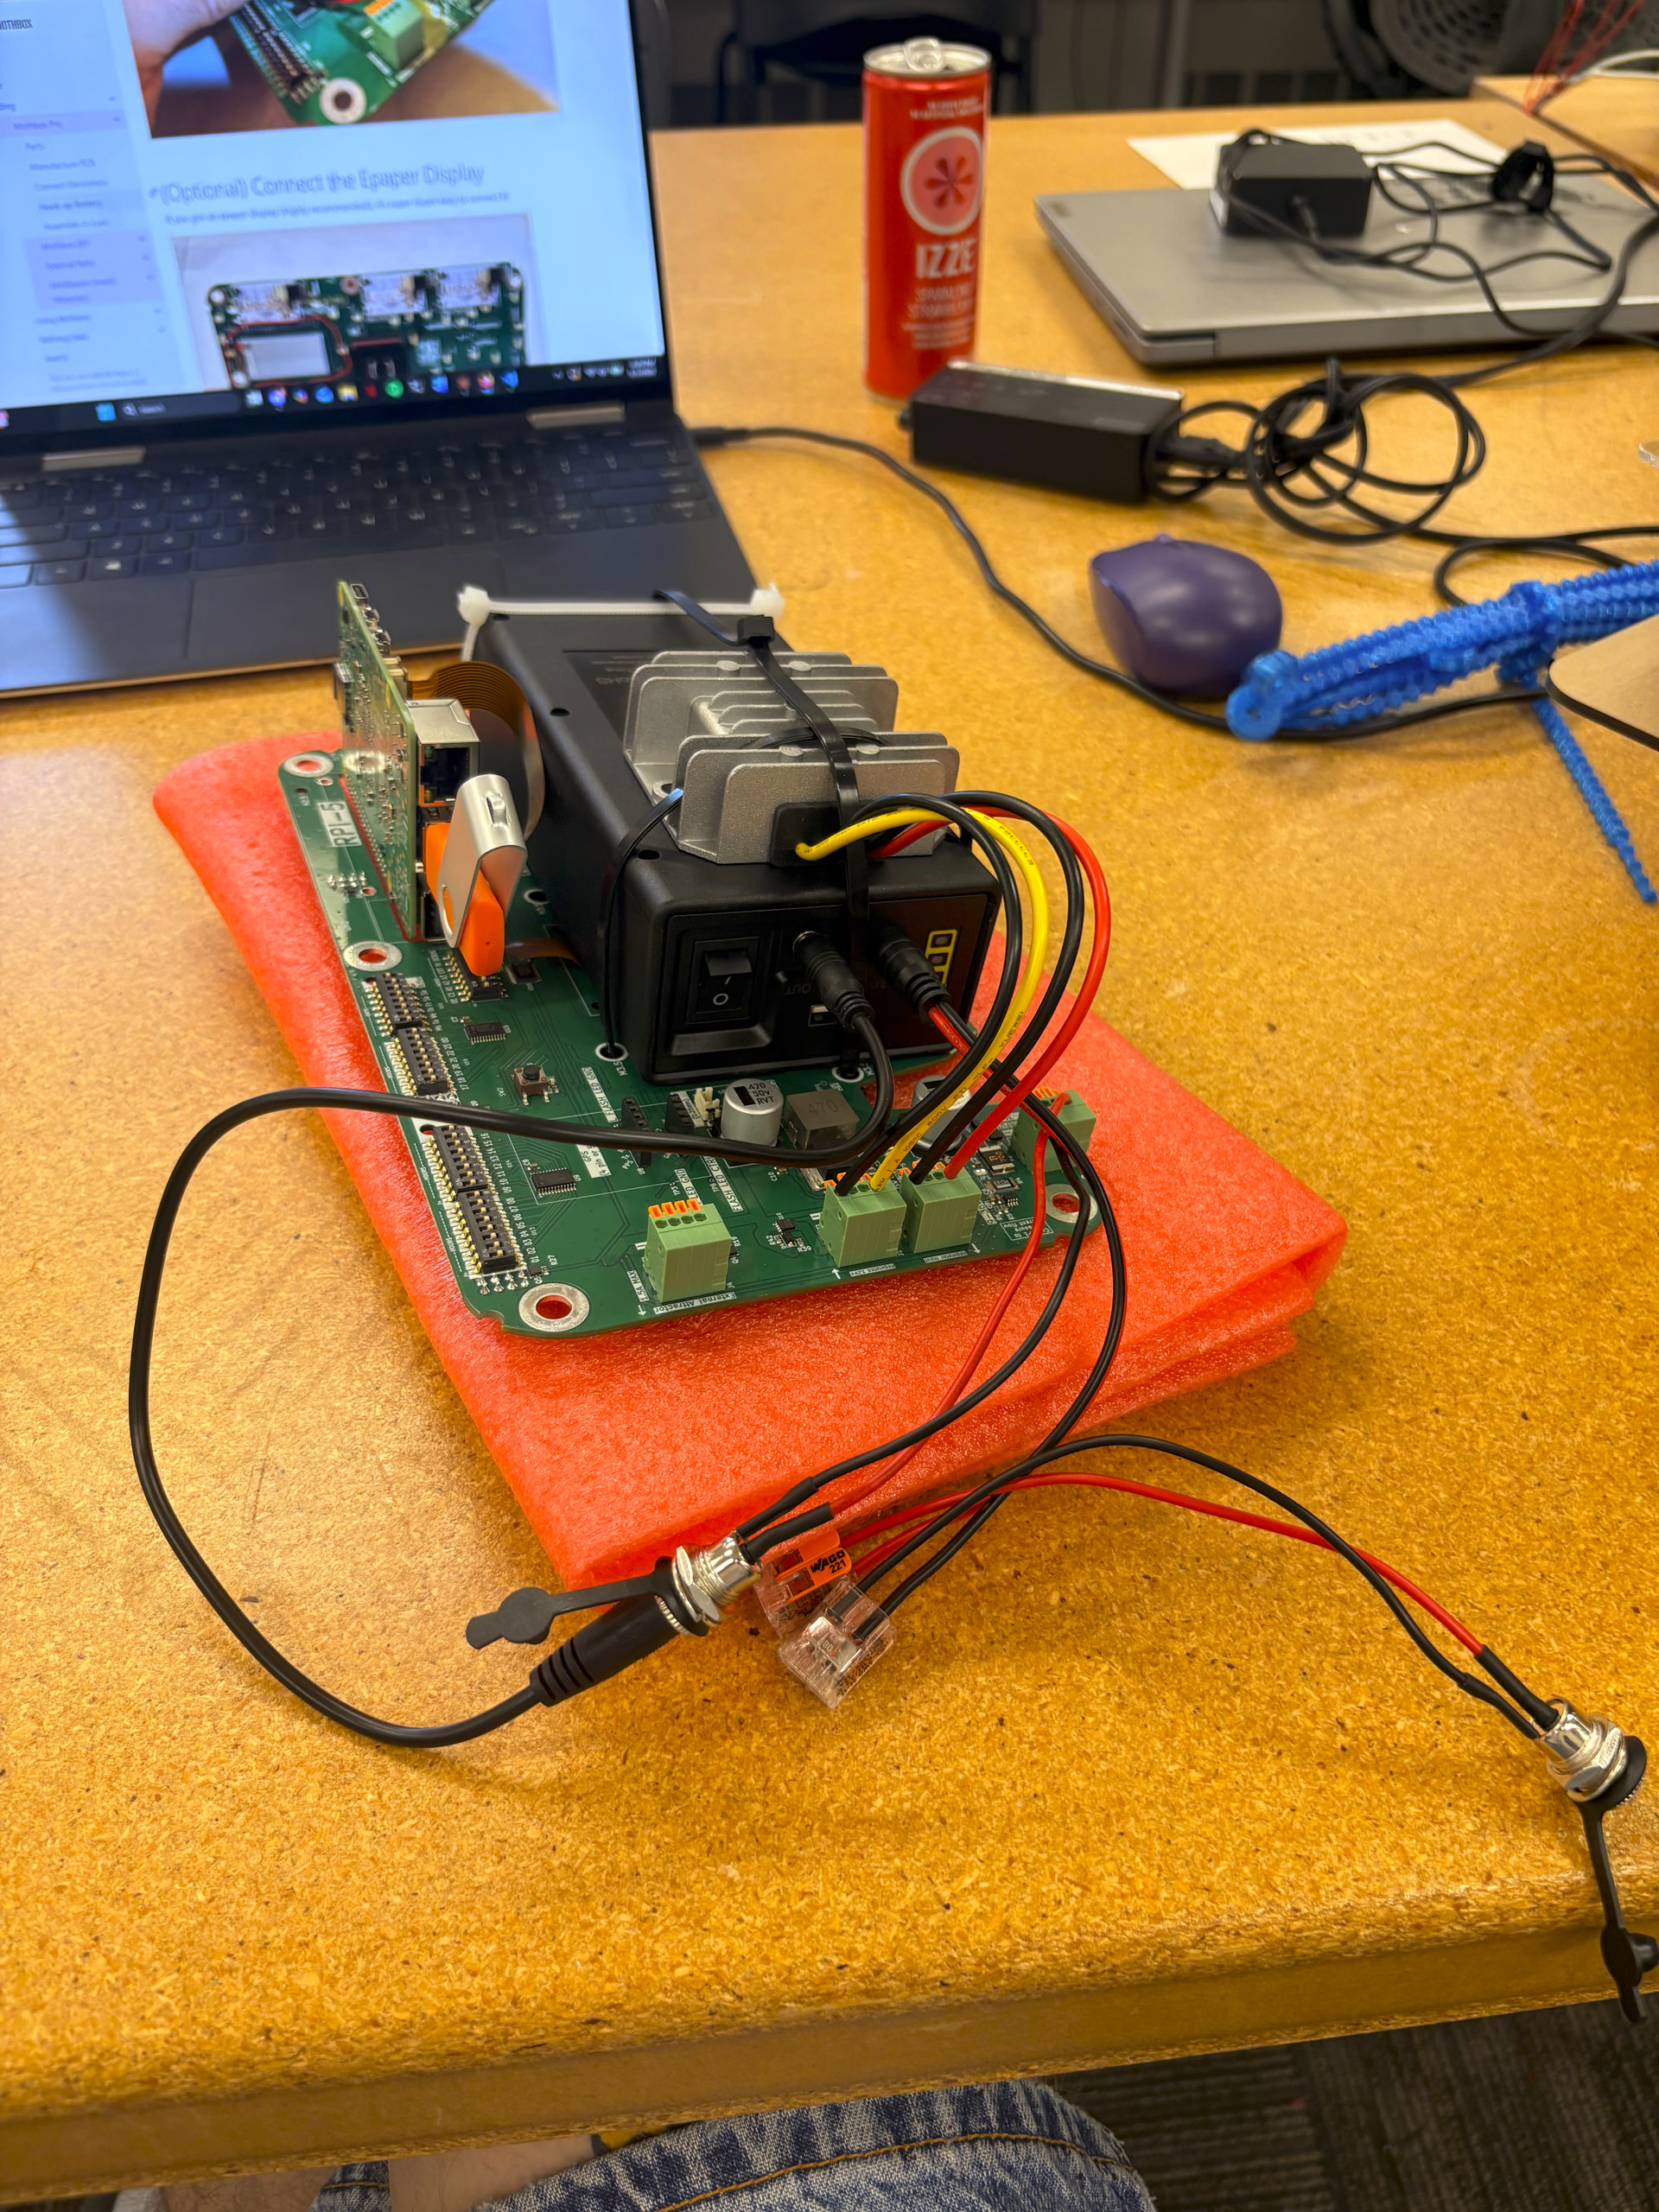
I have started the assembly of my Mothbox Pro! Unfortunate the two items I ordered from Sparkfun (the raspberry pi and RTC battery) have yet to arrive. I am borrowing a pi from the lab I am working in and plan to hook of the RTC once it arrives.
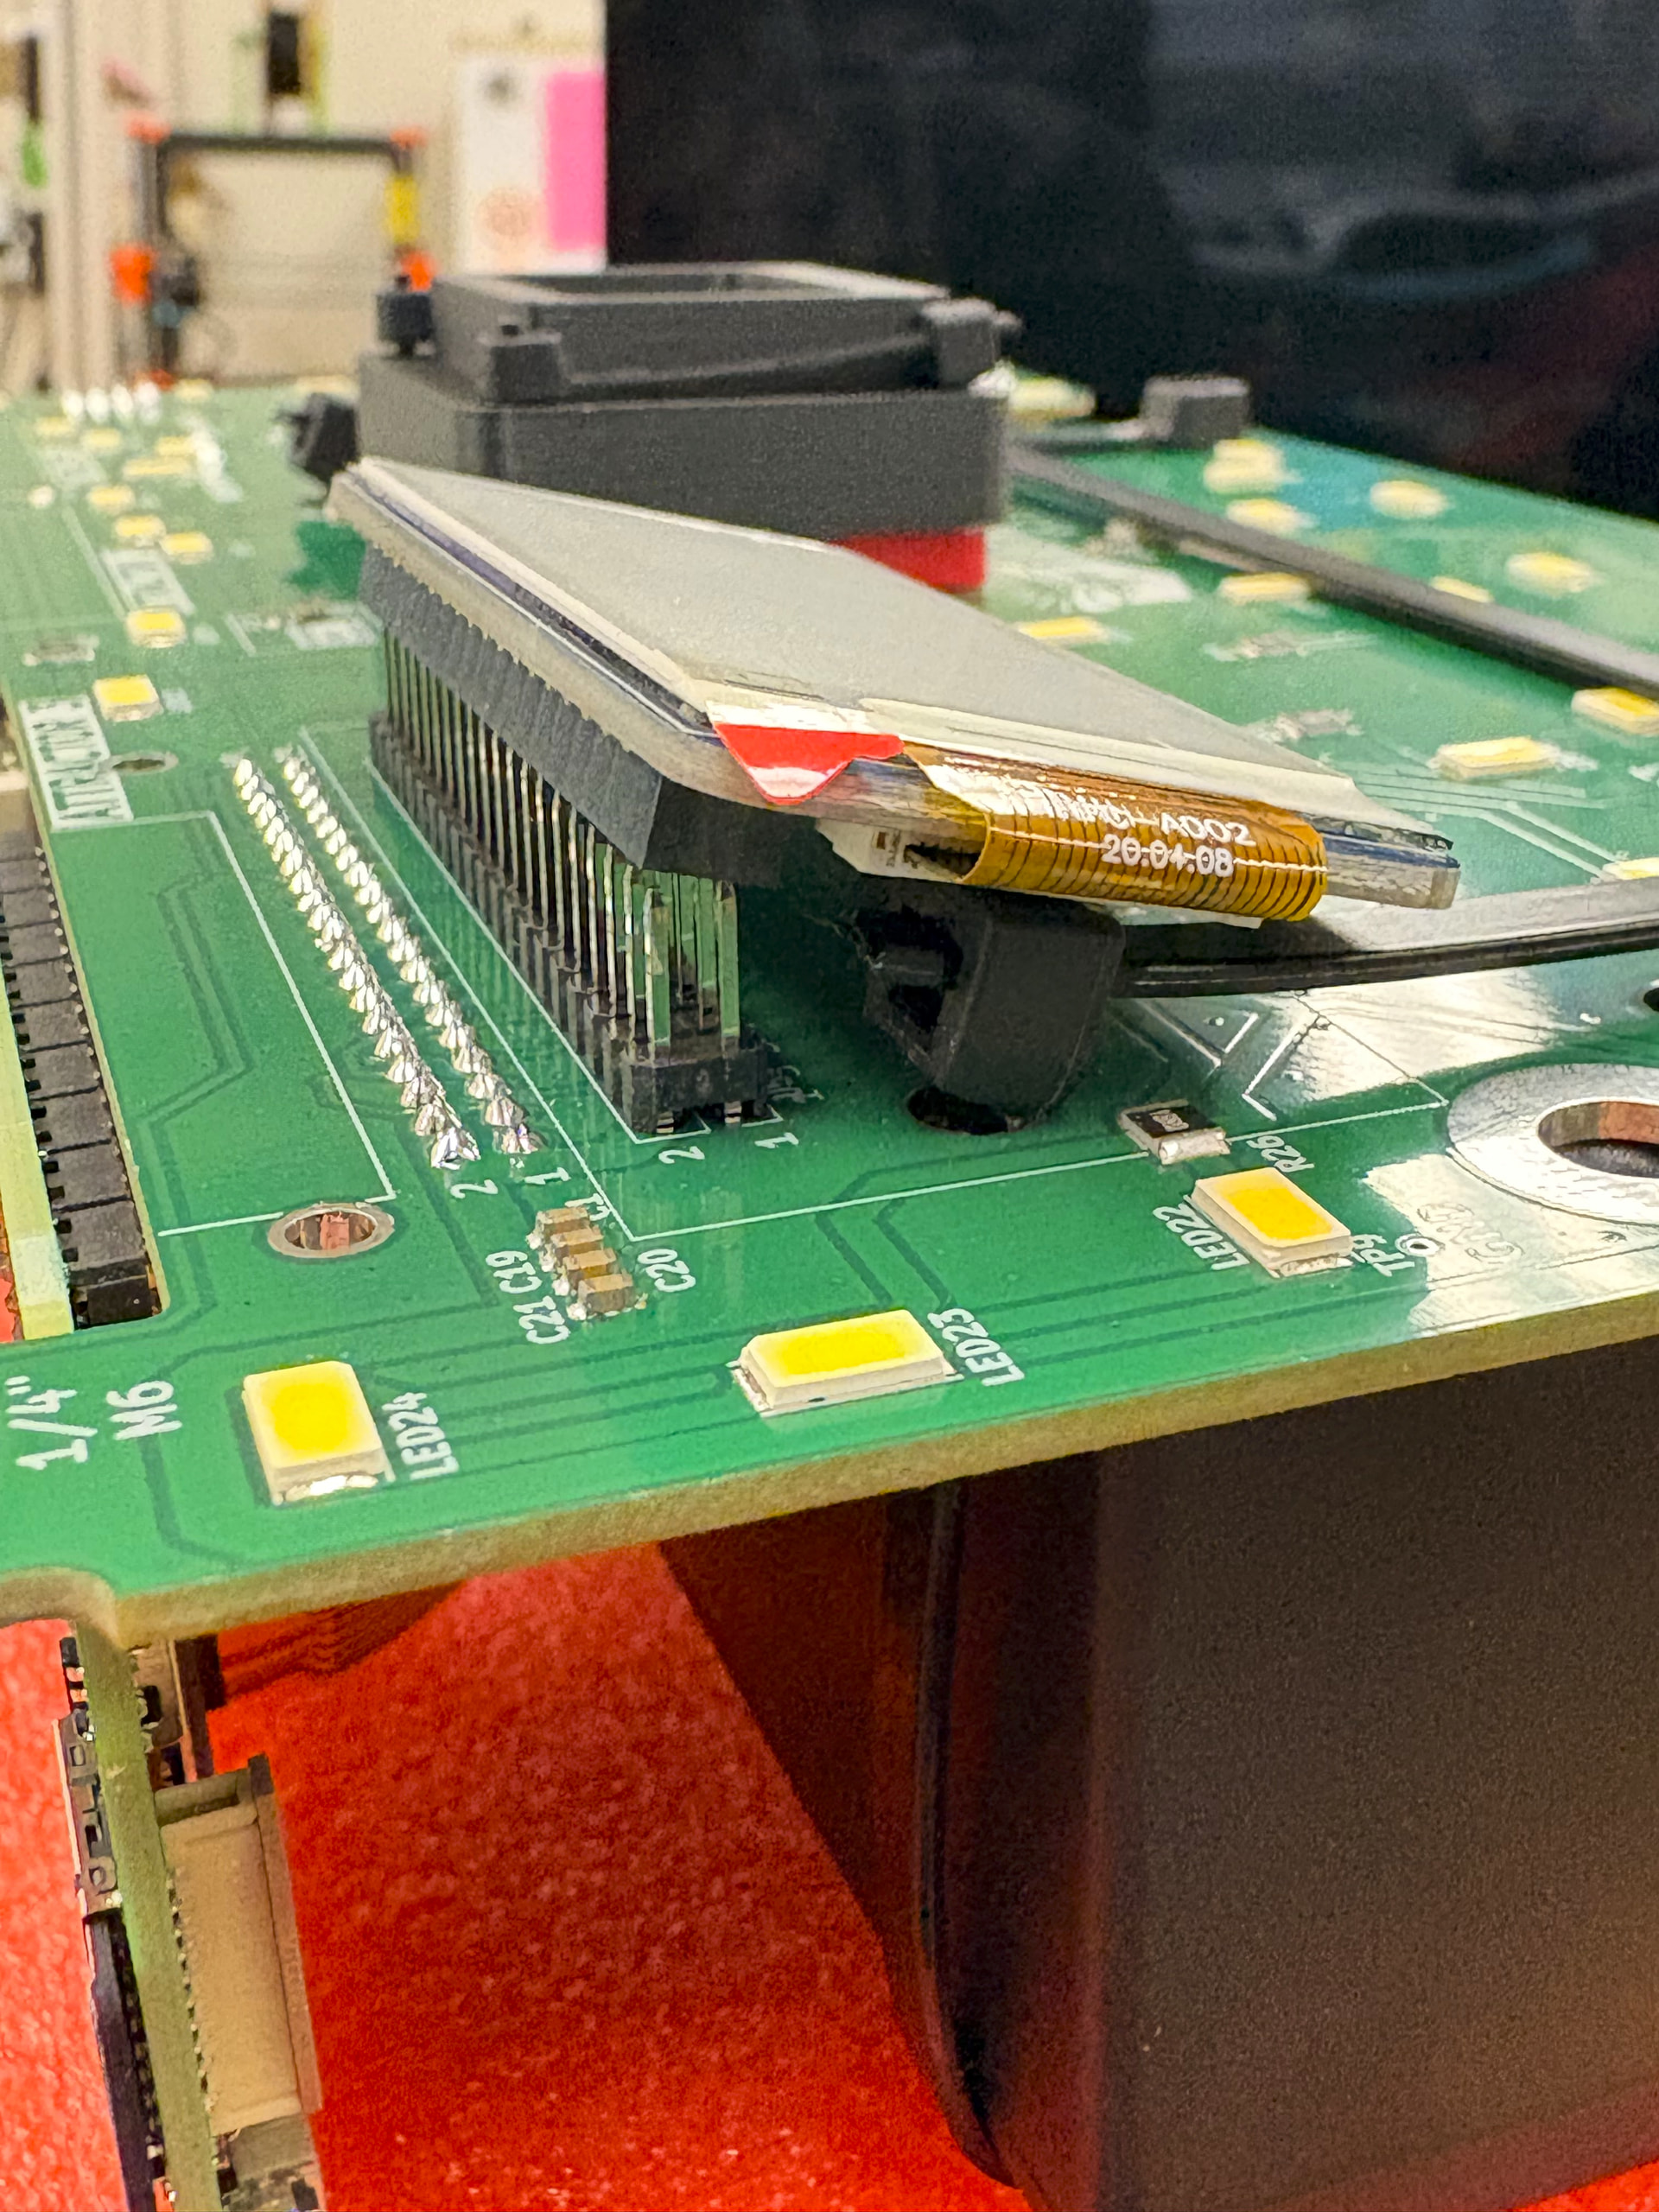
The process laid out in the Mothbox repo was extremely easy to follow and I experienced little deviation using them. I did notice on the new 5.0.5 PBC, one of the holes used to connect the battery interferes with the display on the front of the PBC. This is avoidable by rearranging the zip tie orientation (simple fix).
I am using the PB240B1 battery which is different that the PB120B1 battery used in the assembly instructions. The 12V output port is a smaller size that what the instructions call for. Luckily the battery came with adapters that I was able to configure to attach to the PBC properly.
I opted to use heat inserts and 3M socket screw rather than #6 x 3/8in long screws called for when attaching the PBC to the inner shell. Only because I did not have the #6 x 3/8in long screws.
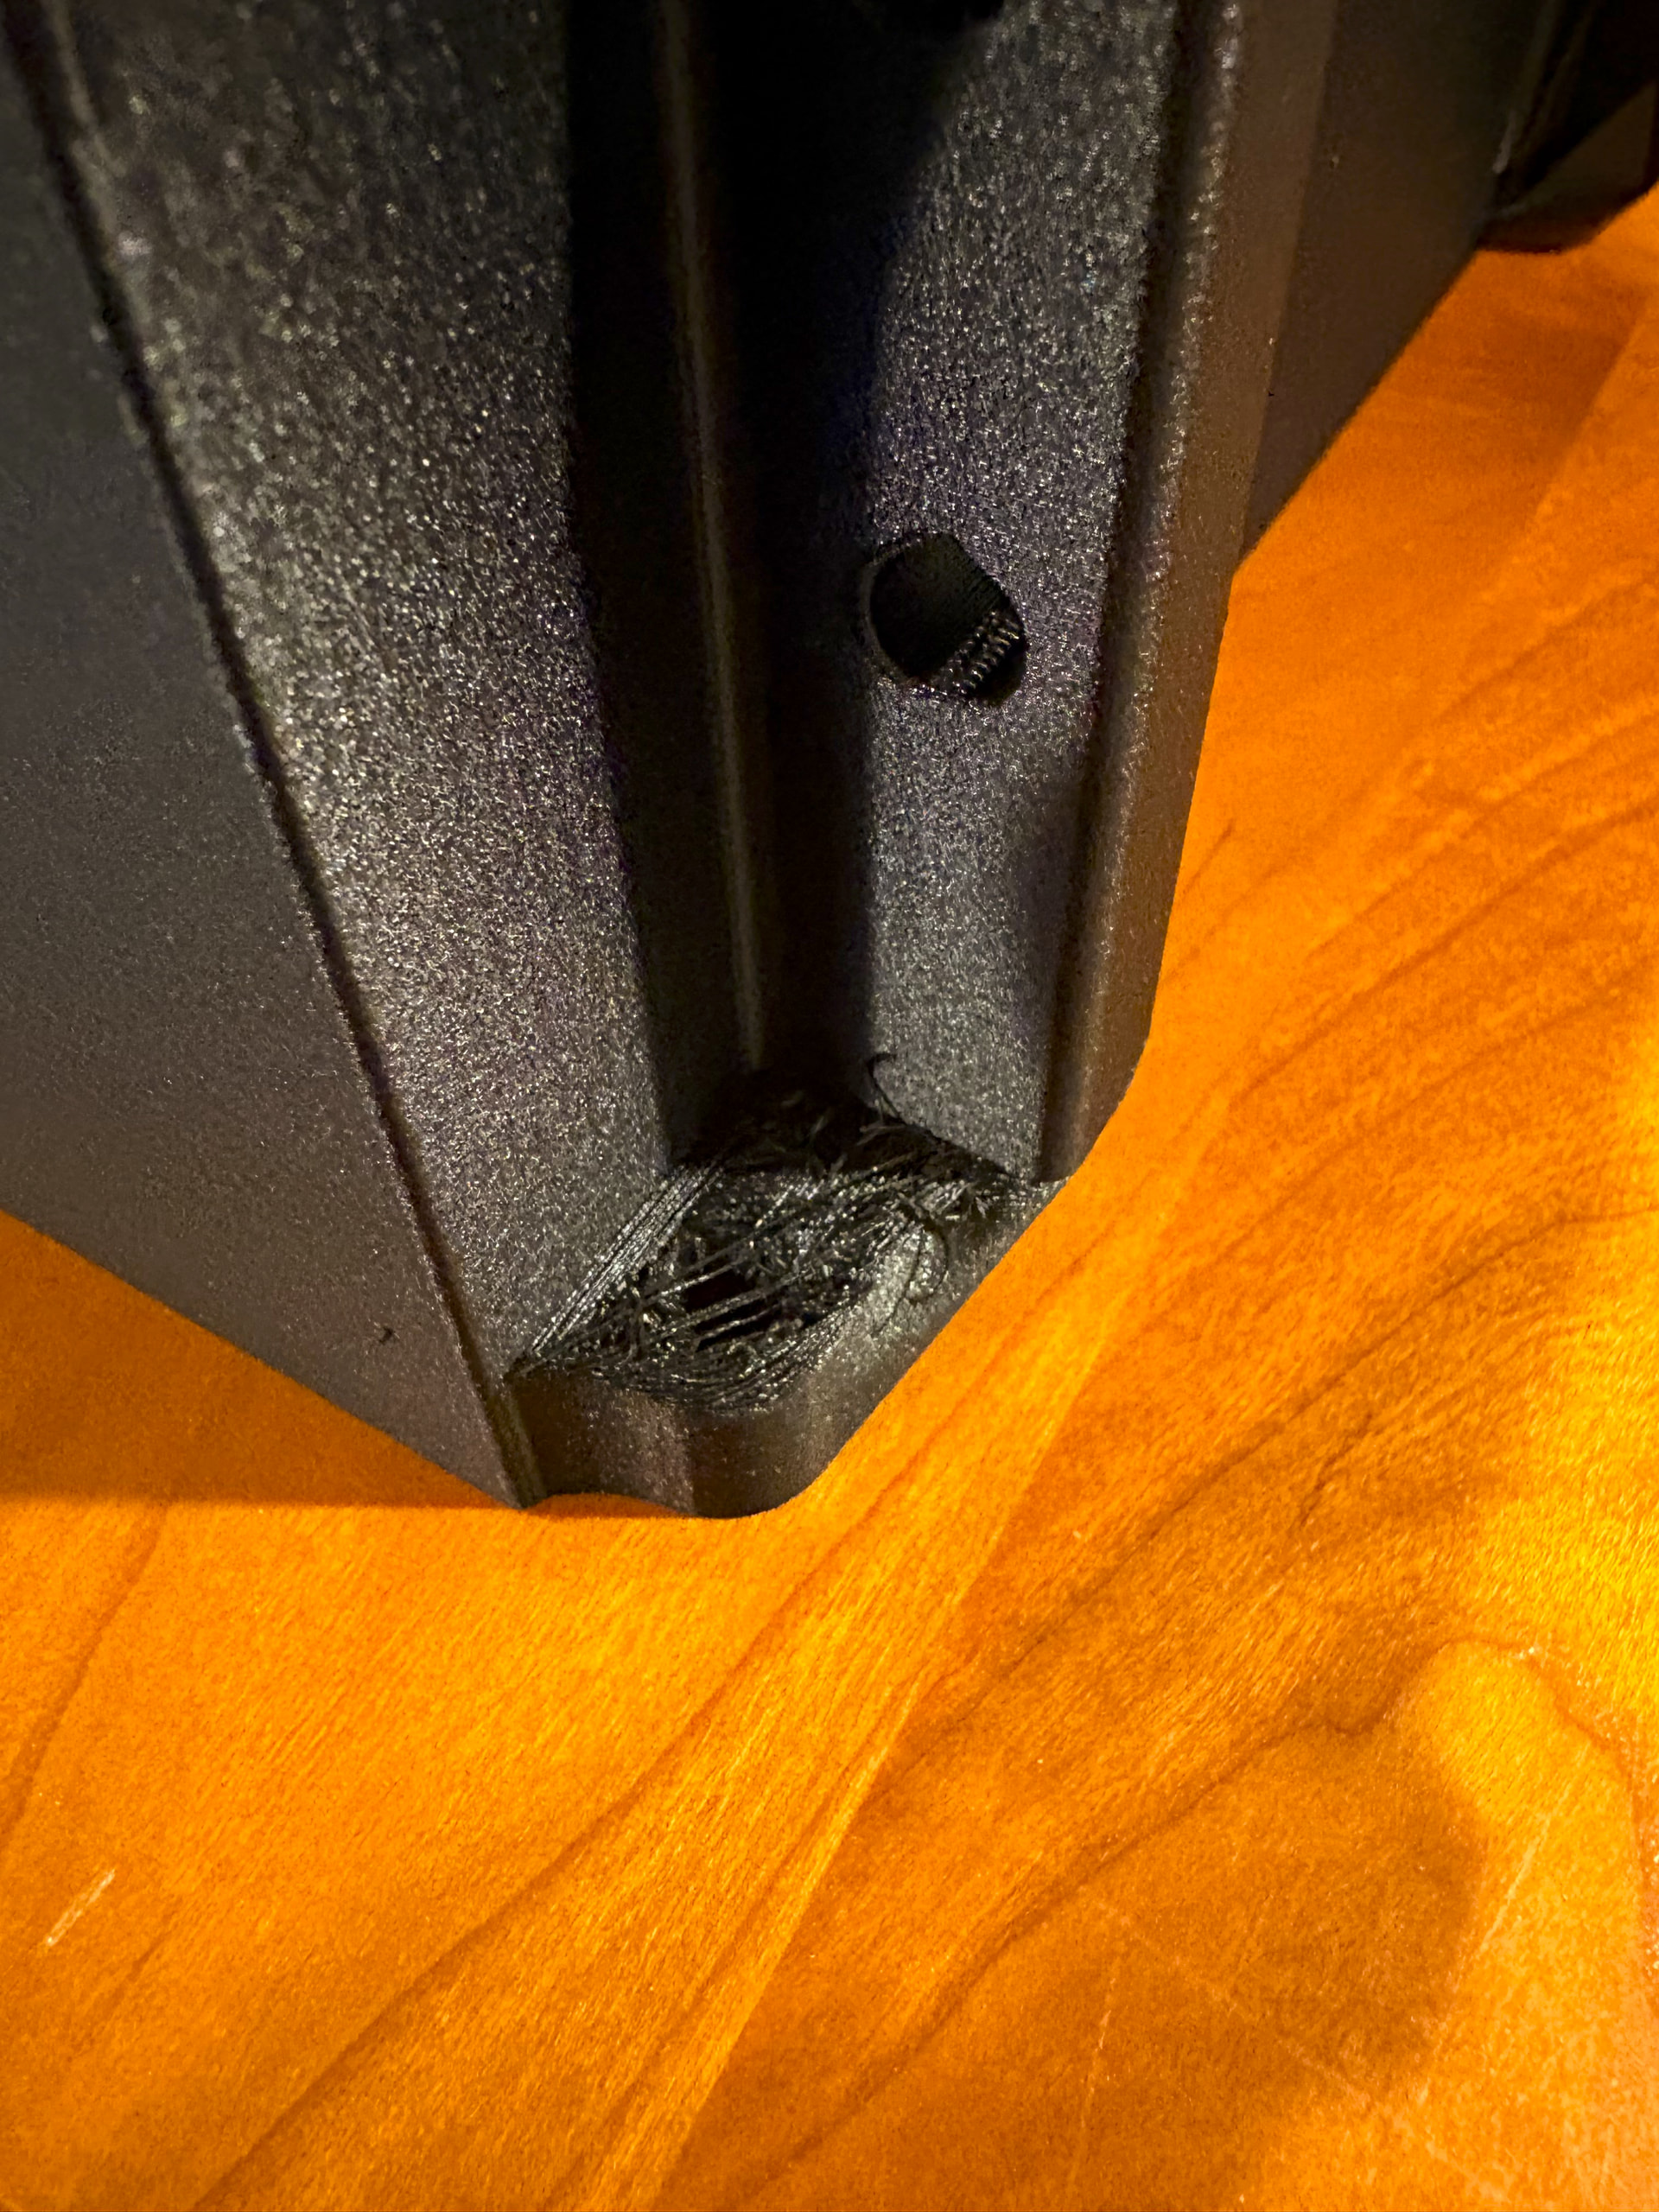
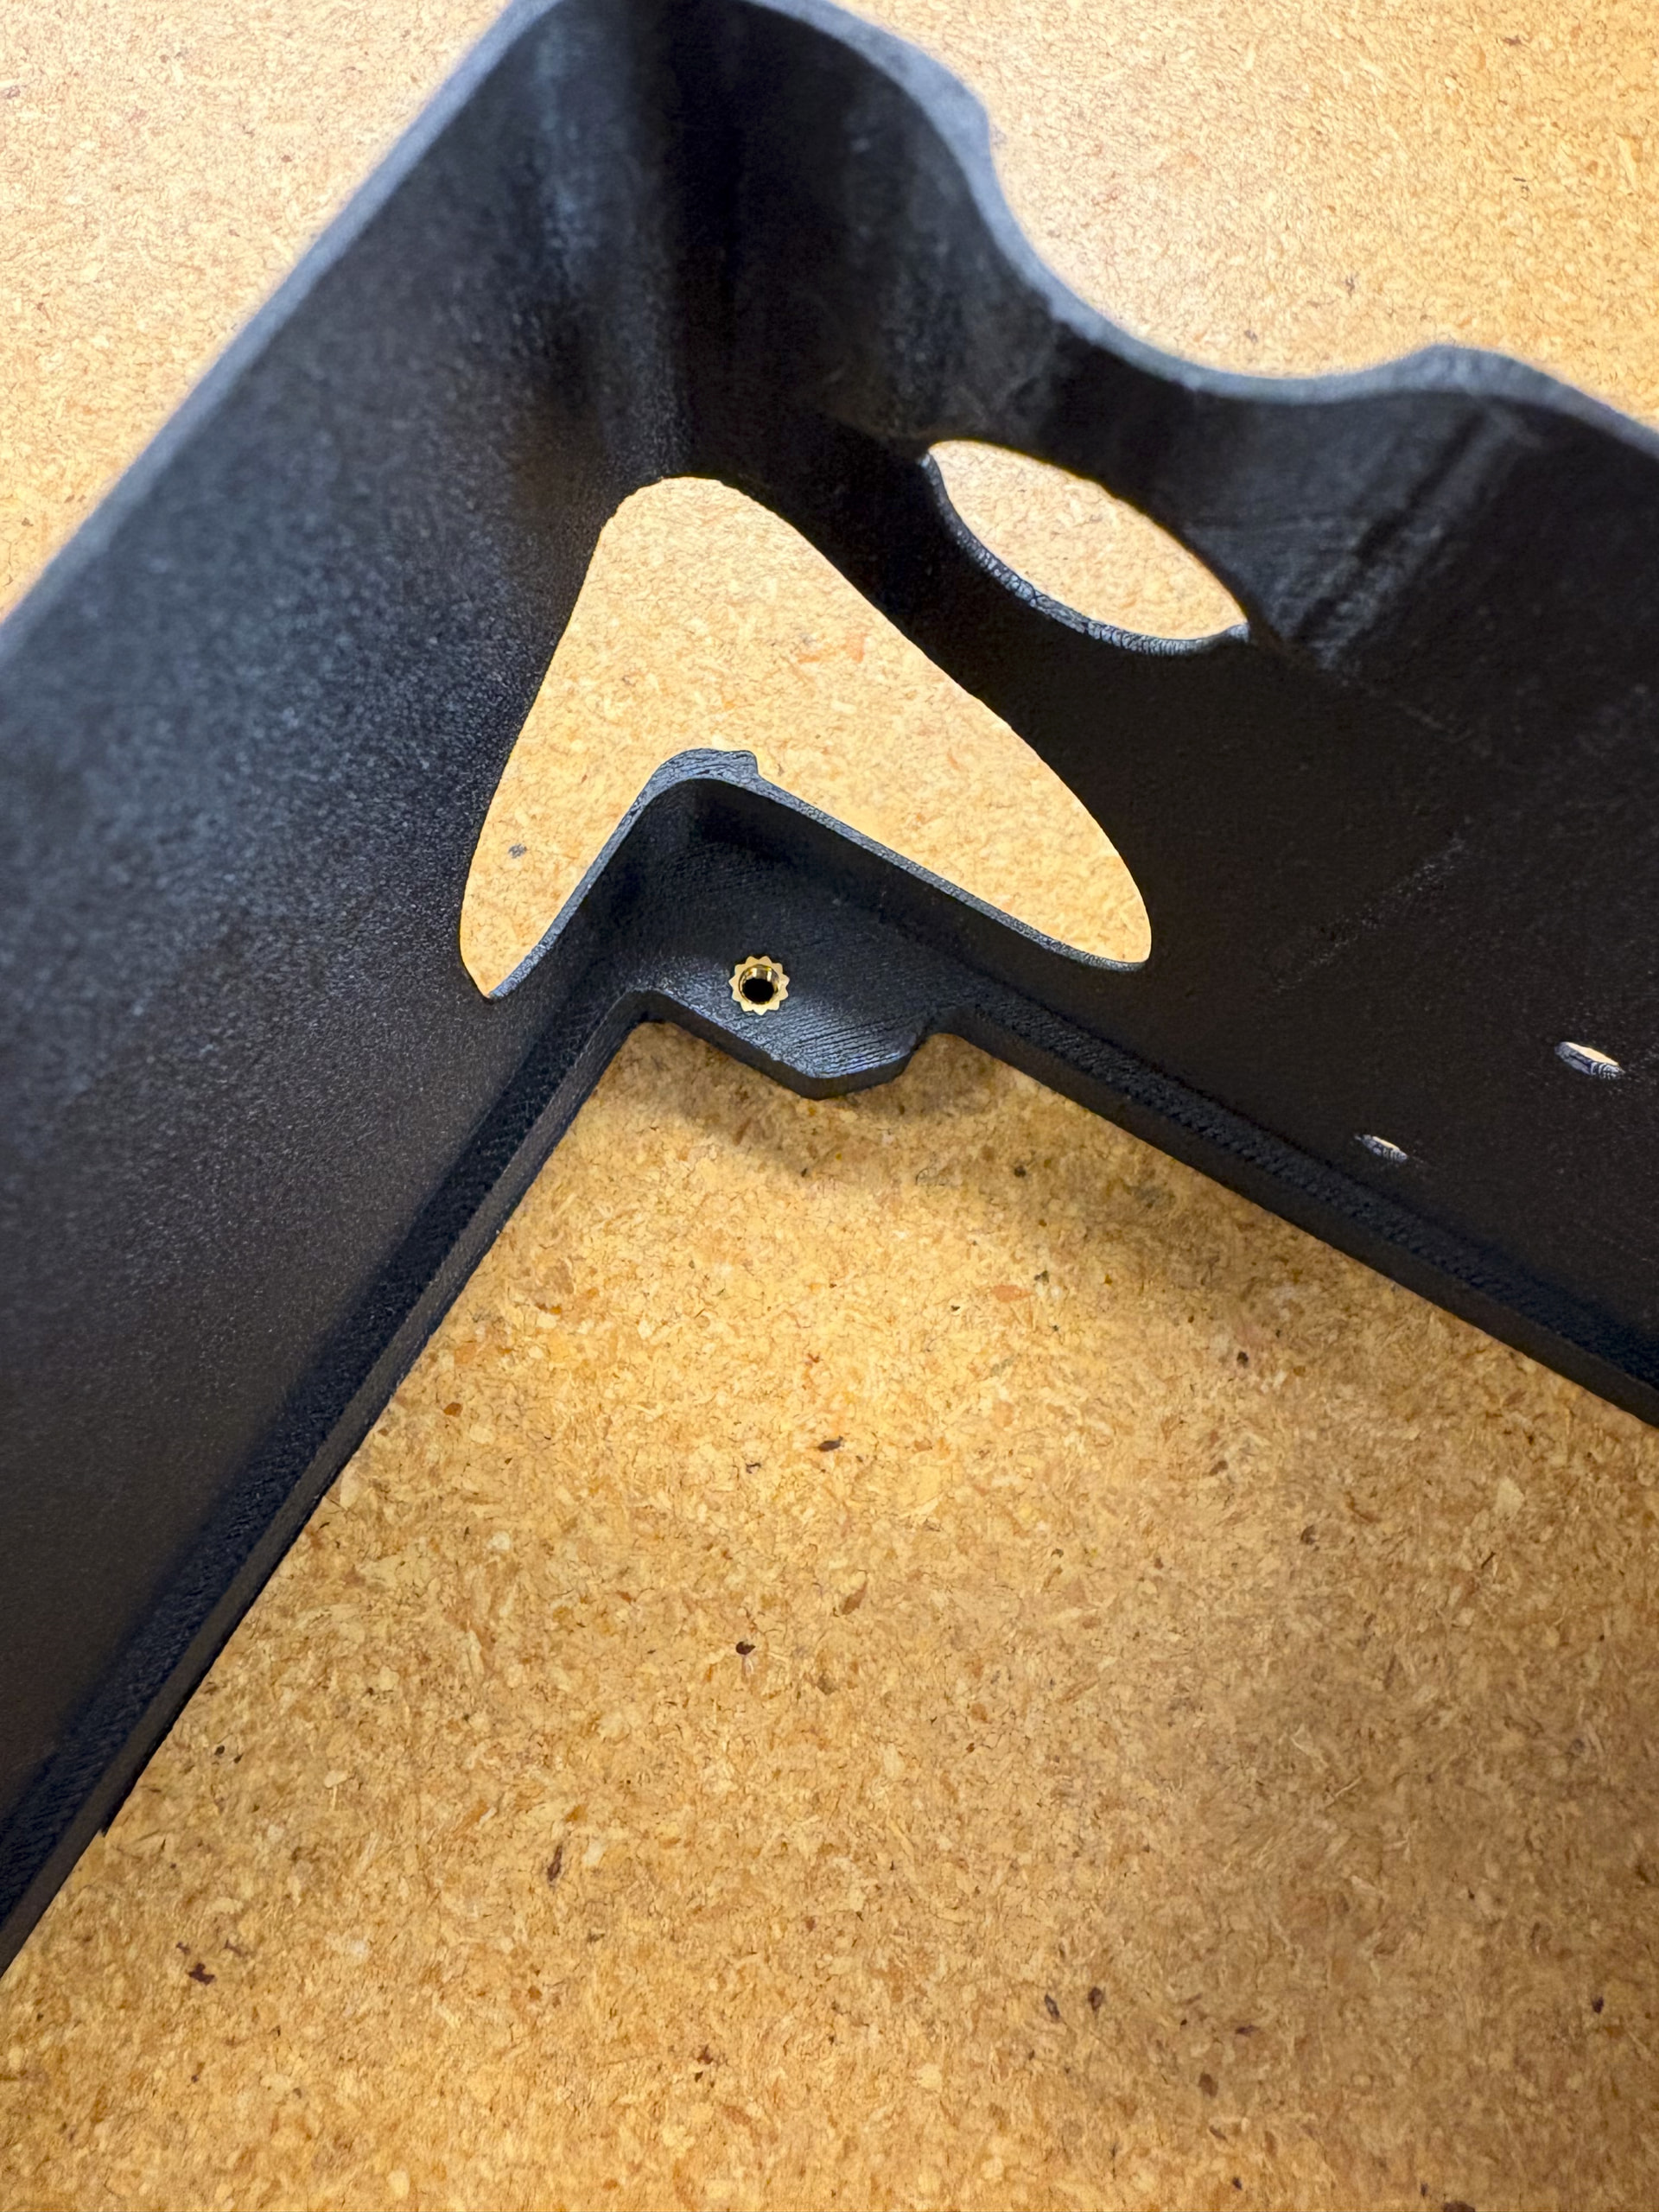
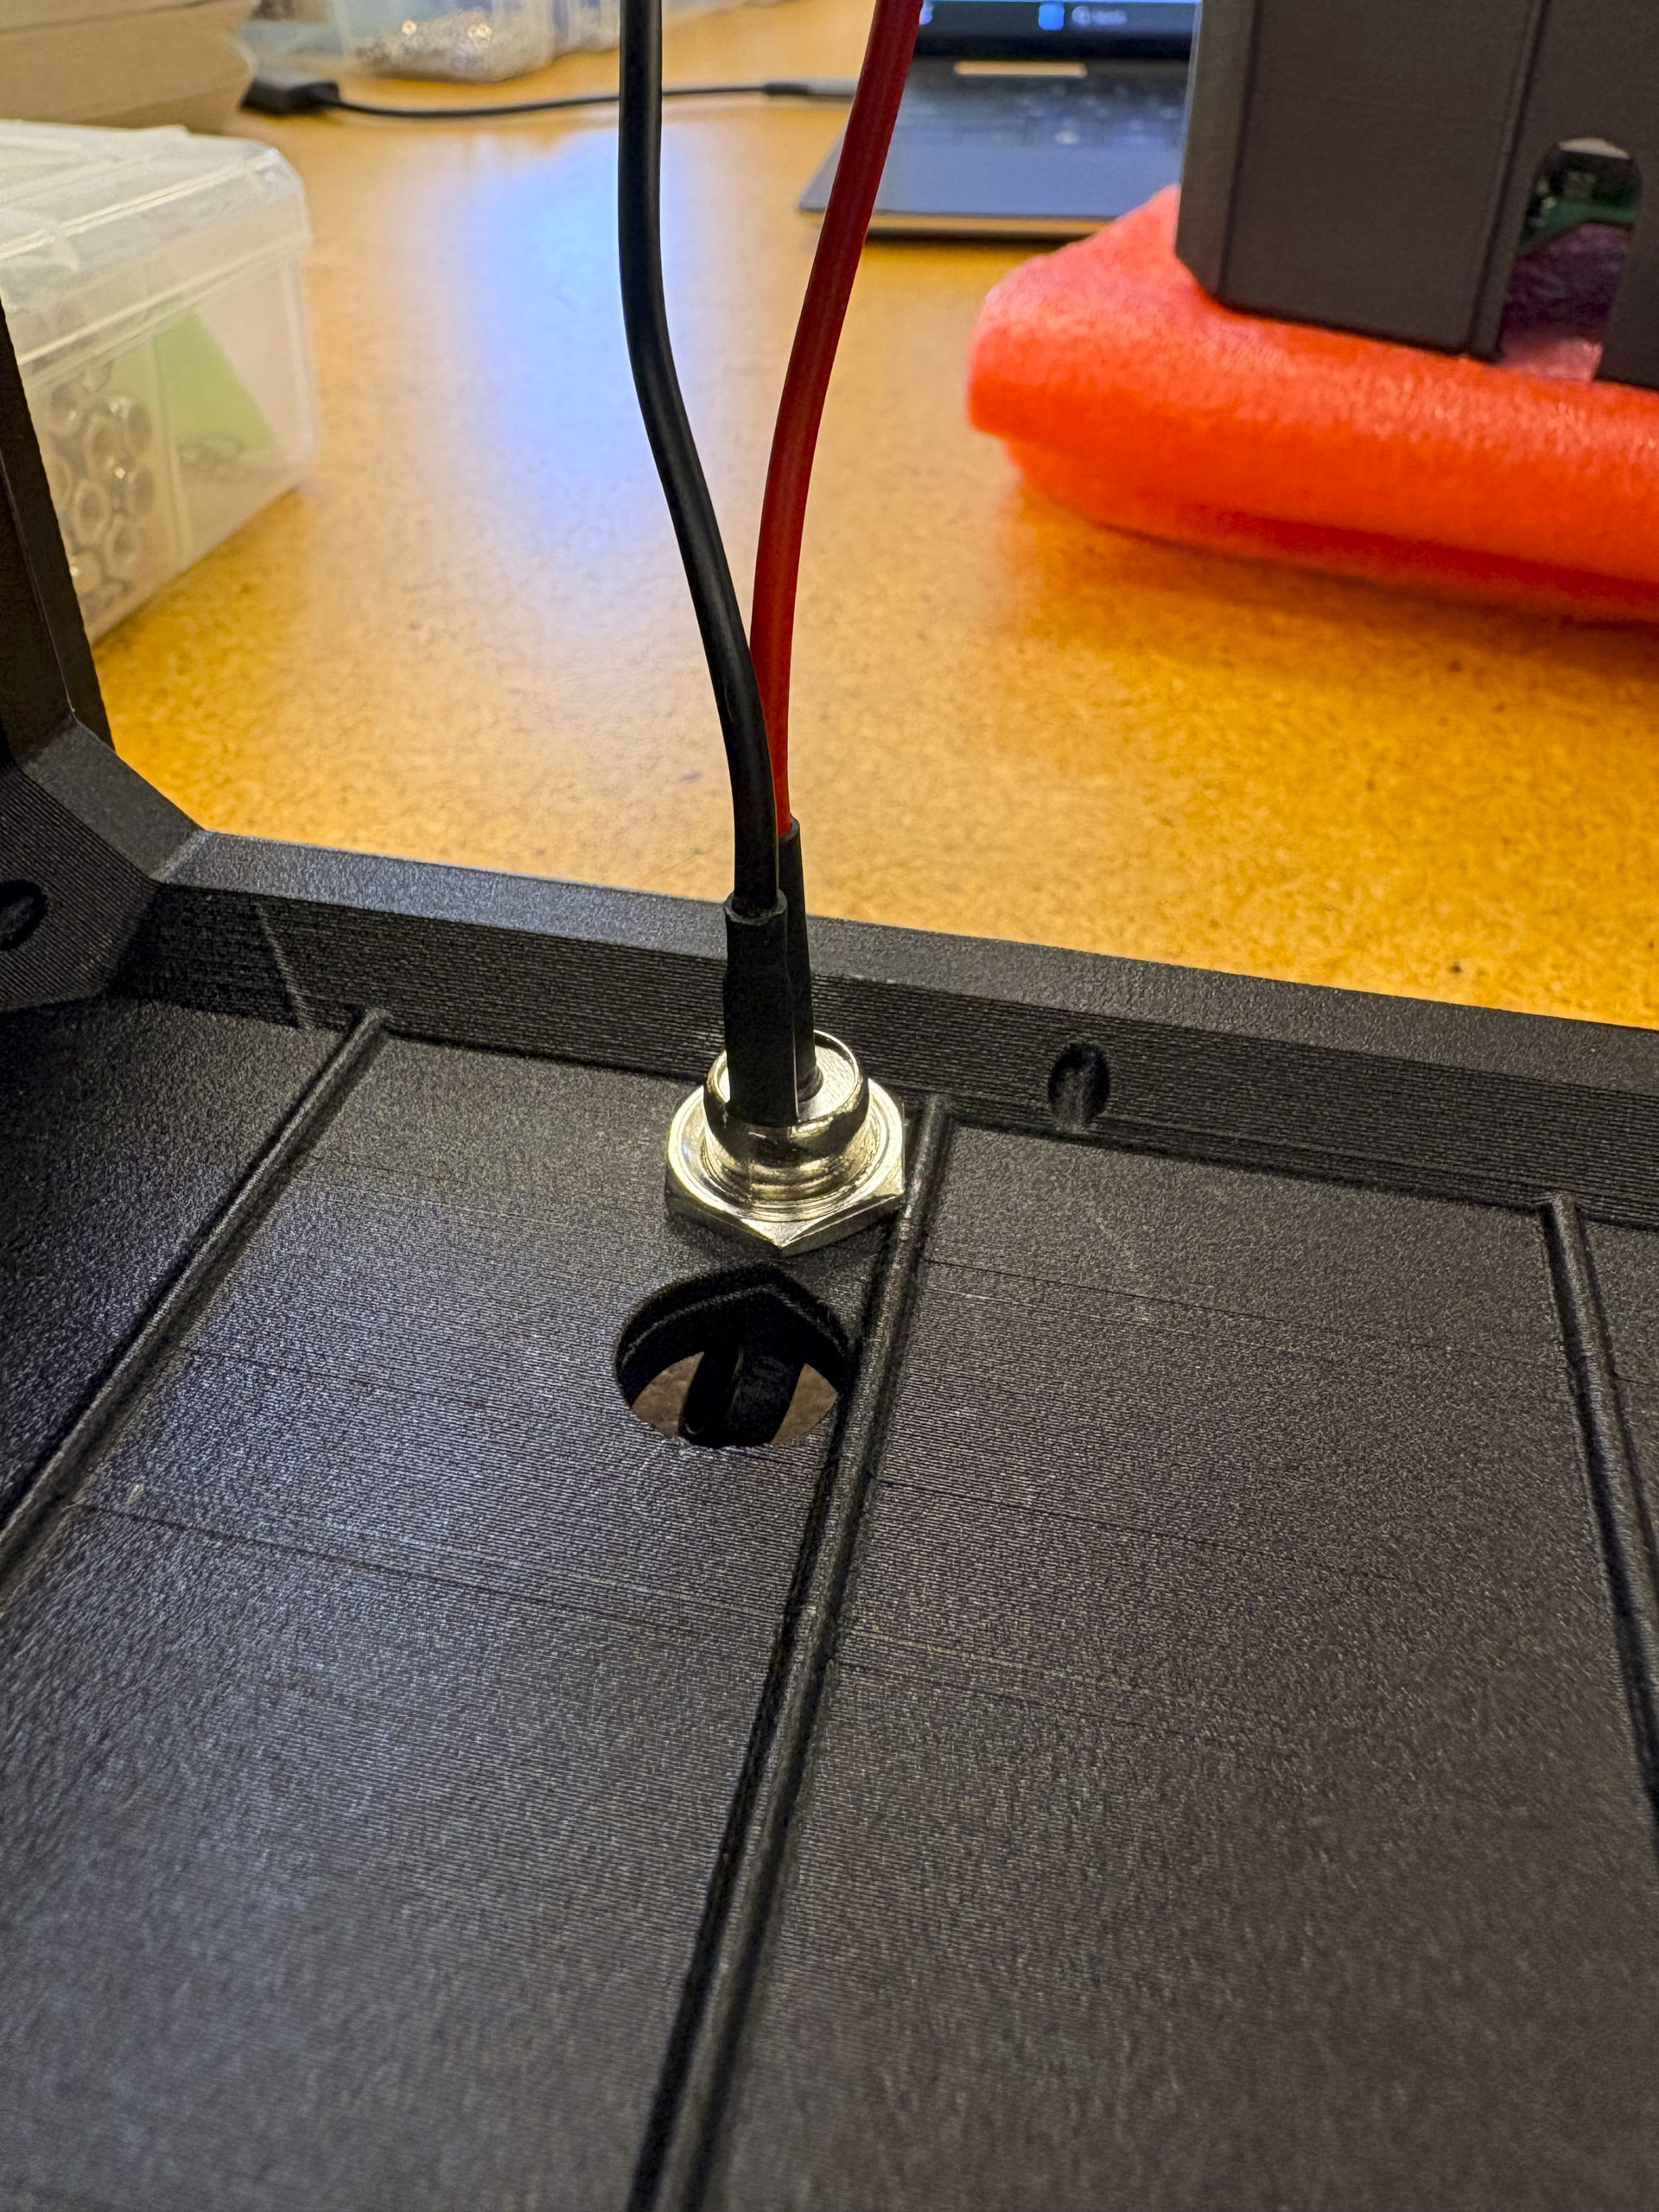
I found that attaching the DC cable for charging to the outer shell was a little challenging. There inst a lot of clearance and the ribs and recessed lip were in the way of the nut I used to secure the port. I feel like this could be solved with slight changes to the inner shell design to account for more clearance. Or just use hot glue:)