We have been posting a few times here about our research on open source & low cost soil respiration measurements. And during all the UROS activities we developed much more stuff for it! @nanocastro@TAKE@squaresolid and many more…
See for example the docu on the hackteria wiki and other links shared in the GOSH forum.
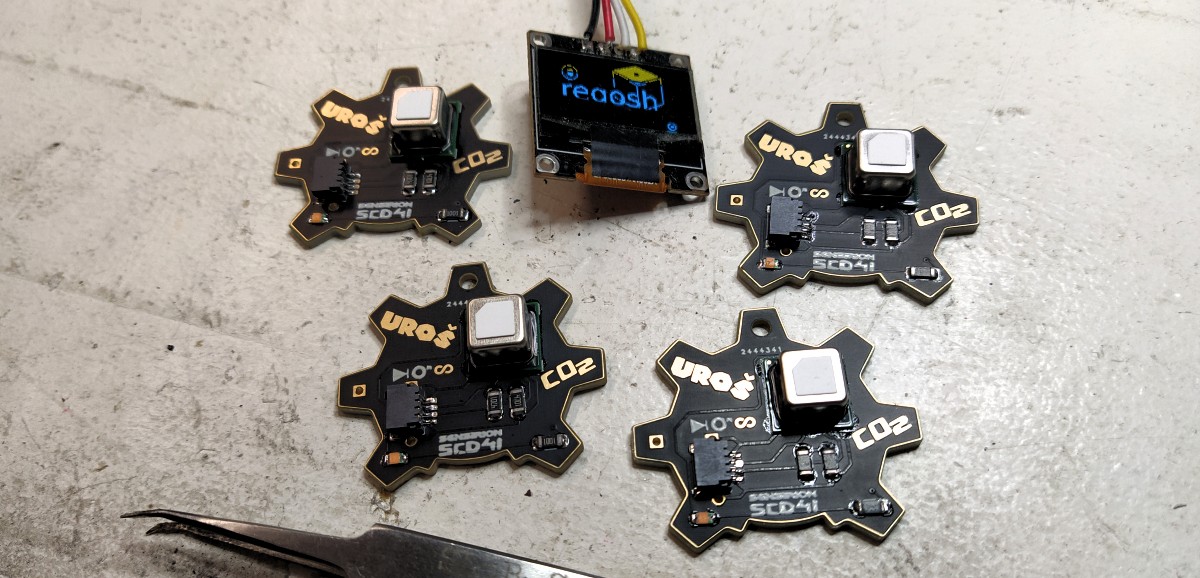
In the meantime we have received sponsorship from the the company Sensirion and received even more sensor chips, SCD41, than we expected!!
We designed our own breakout board and we are happy to share them around the globe!
Reply to this thread and we’ll see how we can get them delivered. Definately I make sure many of them go to th GOSH 2022 in Panama. Anyone can pick them up in Zürich, Switzerland?
How are they soldered?
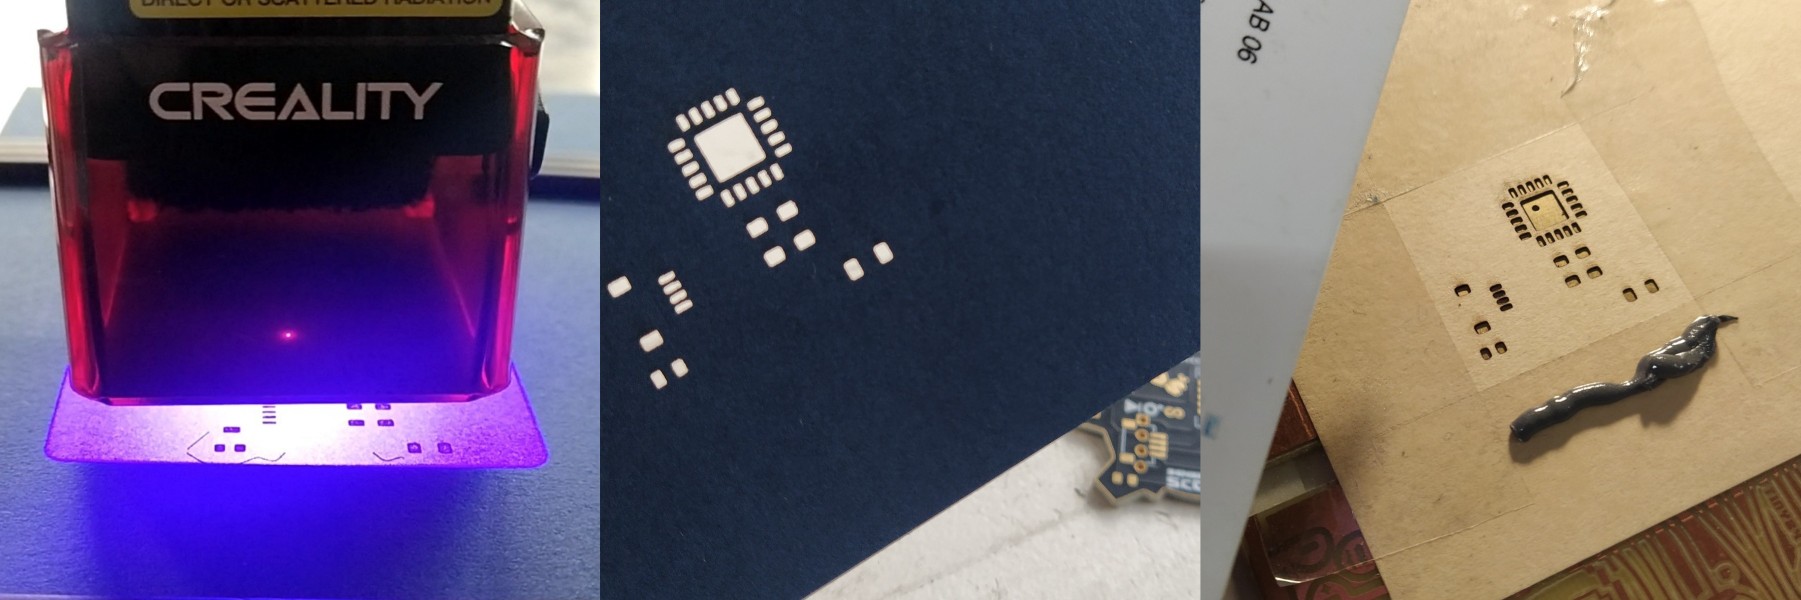
Also I just developed a pretty robust homebrew reflowing method to solder the chips and the rest of the components to be ready to attach to your I2C microcontroller of choice.
With this cheap laser engraver head from Creality, it’s possible to cut (burn) out a stencil out of paper, mbe the areas have to be shrunken a bit in design software, to compensate for the laser burning focus spot. Then just spread the paste over the PCB…
It should leave an even amount of paste on all the pads. That little cutie of a hotplate also comes in handy, approx 100 USD from Banggod, but a simple toaster over or kitchen hotplate should work fine too!!
good old times reflow soldering them at tropical waterfalls with a USB powerbank…
Hello, @dusjagr ! I’m Octavio, one of the persons that had a chat with you this week from Nano’s reGOSH residence in Mendoza.
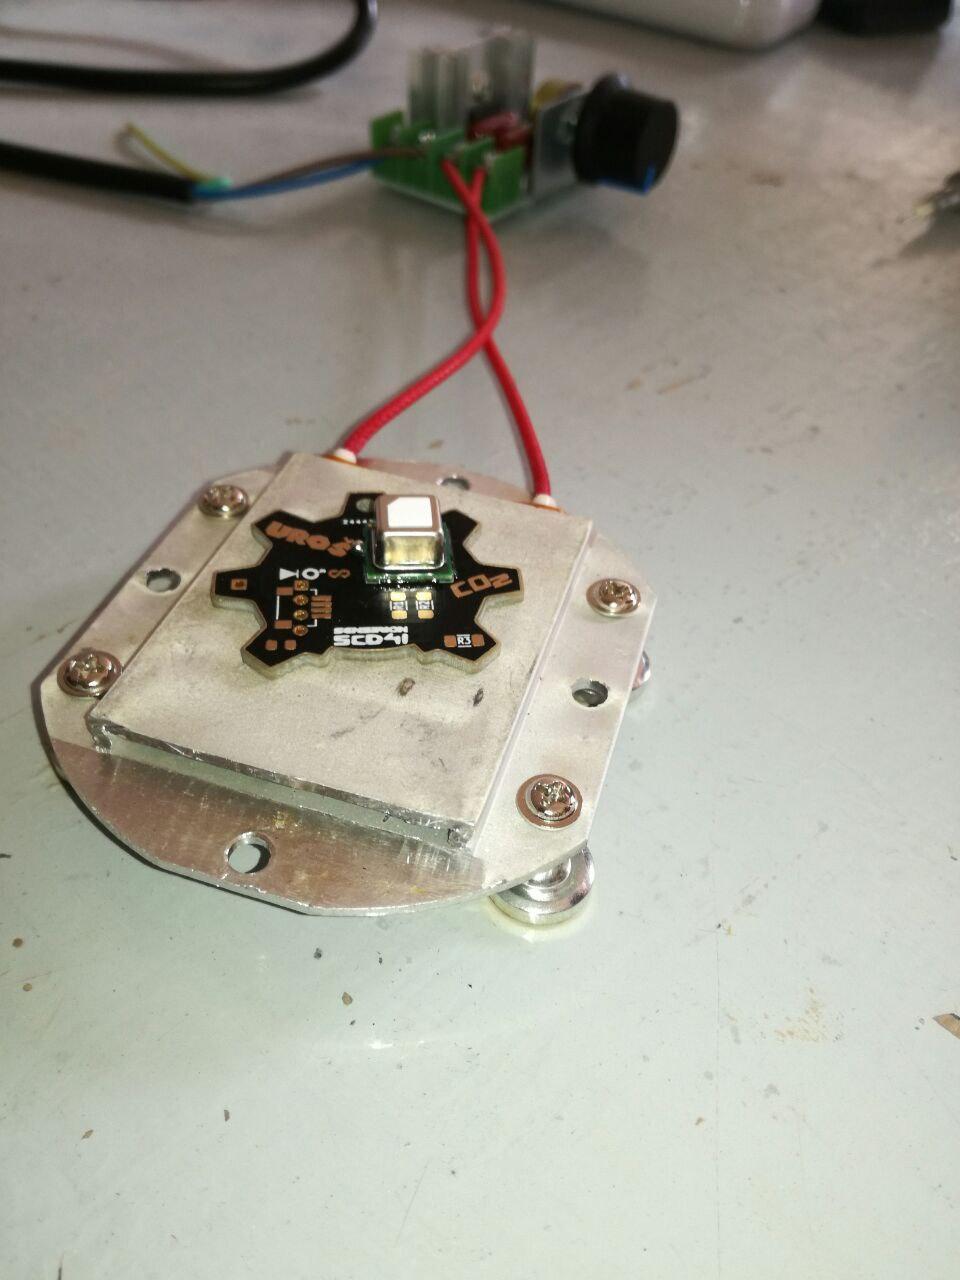
Unfortunately, it seems the cute hotplate you gave to us got broken, and we wanted a solution with an intermediate level of sofistication (something above a toaster, but bellow the tiny oven).
We bought a crude aluminum hotplate that’s meant for house lighting LED installations and attached a regular home light dimmer and it worked just fine! So far we just attached an arduino with a temperature sensor to be sure we would not burn the circuit before testing, but this probably can be improved with some actual arduino control, a display, etc, which we might attempt during these days. This way it already works and you can set it up in just some minutes, which I believe is exciting.
In Synthesis
Materials
LED soldering aluminum hotplate (AR$3500, or around US$12).
Regular house light dimmer (it was lying around but it is cheap).
Regular wall power cable.
Optionally, you can just set any arduino temperature measurement project and check if it’s doing fine before soldering.
Yeah, this also looks good.
any cheap cooking plate works aswell. just watch the process by eye, not really needed to control temperature too precicely.
I usually go to 200° then briefly , like 10-20 second to 250, and let it cool down on the plate, turned off.
I hope you can fix the little hotplate i donated to nano. you need a PD 4.0 power supply. i doubt you broke it.