Hi everybody!
I’ll be taking over the regular Mothbox Updates that Andy (@hikinghack) has been doing while I’m working with the Dinalabs team over the next few months. For those curious, you can read the previous Mothbox updates here. In today’s post, I’ll discuss our recent Mothbox workshop at the Georgia Institute of Technology (Georgia Tech).
The workshop was spearheaded by Yash Sondhi, a postdoctoral researcher from the Agile Systems Lab at Georgia Tech and collaborator on the Mothbox project. We had eight workshop participants in total, and while most were from Georgia Tech, we also had a group join us from the Florida Museum as part of the Kawahara Lab. During the workshop, we were working with version 4.5 of the Mothbox.
The workshop was supported by the Multidisciplinary University Research Initiative (MURI) award. We also had in-person support from the Institute for People and Technology at Georgia Tech, who hosted us in their lab spaces (the Craft Lab and Prototyping Lab) and provided assistance with some of the Mothbox assembly.
I was lucky enough to join the workshop in Atlanta before heading to Panama with Andy, where I’ll spend 10 months studying the Mothbox as part of a Fulbright student research grant. The workshop was my first time building a Mothbox and was the perfect introduction to the project!
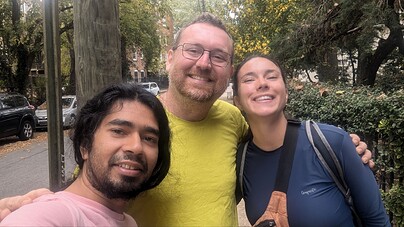
Photo of Andy, Yash, and Bri, who had a lovely meet-up the day before the workshop!
Workshop Day 1: Let the building begin!
On the first day of the workshop, we focused on assembling the device’s internal and external components, where we tested our wiring skills while getting plenty of practice in drilling and epoxying parts.
Assembling the internal components
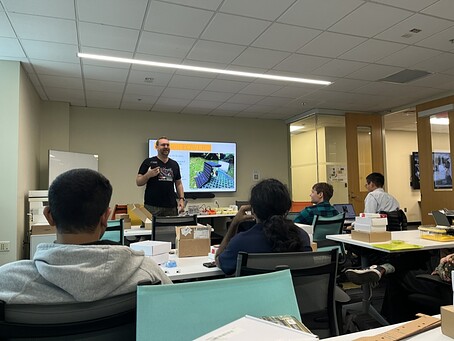
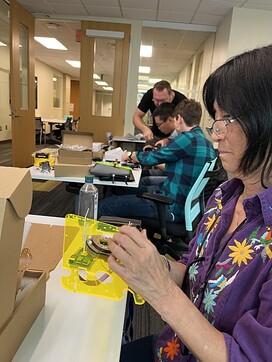
After a quick introductory presentation by Andy, we tackled the first step: constructing the internal components, starting with the camera glare blocker. We were fortunate enough to have all the acrylic internal parts laser cut beforehand, which meant all we had to do was put them together using zip ties.
Photo of Andy giving an introductory presentation to help orient the group before they start building Mothboxes.
Photo of a workshop attendee attaching the camera glare blocker to the main board of the Mothbox
Throughout the build process, we followed the extensive documentation that the Mothbox project has organized here.
Wiring Electronics and Flashing Software
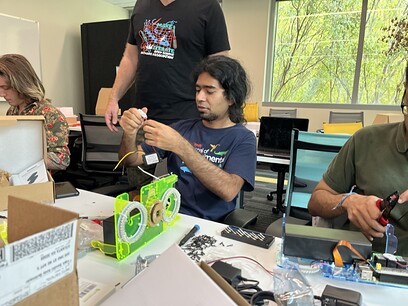
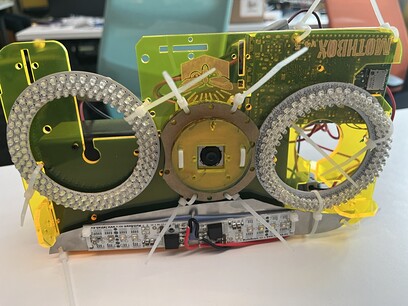
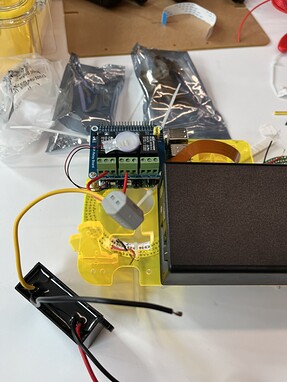
Once the camera glare blocker was assembled and attached to the main board of the Mothbox, it was time to move on to wiring the electrical components of the Mothbox. When building this version of the Mothbox, the electronic components that you are working with include two ring lights and a Mothbeam (or the attractor lights) that go on the front of the main board and a battery, 12V regulator, Raspberry Pi, and relay board on the backside. Following the circuit diagram provided in the documentation, we wired up our electronic components.
Photo of a workshop attendee attaching wires from the 12V regulator to a lever nut
Photo of the front side of the Mothbox main board, with the two ring lights and Mothbeam attached
Photo of the back side of the Mothbox main board, with the battery, 12V regulator, Raspberry Pi, and relay board attached (but not yet connected)
The use of lever nuts as electrical connectors (as opposed to soldering) is critical. The Mothbox is designed to be easy to fix if and when things go wrong in the field. Therefore, using lever nuts is intentional, providing researchers and field technicians with the ability to repair any wiring in a less time-consuming way and without requiring additional specialized equipment such as a soldering kit.
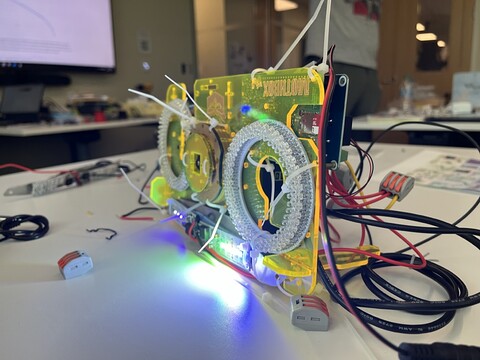
Once we finished the wiring, we had to flash the appropriate software for the Raspberry Pi onto an SD card. Once the software was installed and the SD card was inserted into the Raspberry Pi, we could turn the Mothbox on and check that the lights were working.
Photo of a Mothbox board with the attractor lights on
Drilling, epoxying, and finishing up the external components
We spent the remaining hours of the first day of the workshop building the external components for the Mothbox, which consists of a modified Plano 1460-00 box and the acrylic arms, which were also laser cut for us before the workshop.
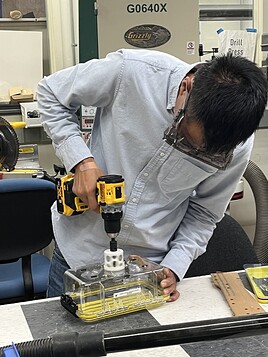
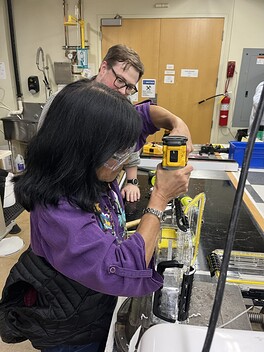
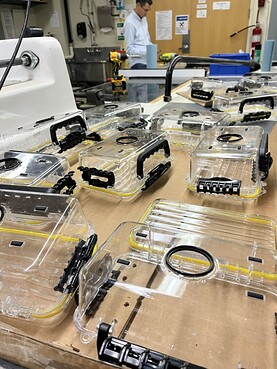
We started by drilling arm holes and a front lens hole on the Mothbox. We then secured the arms with bolts to the box and epoxyed a lens adapter to the front lens hole. The epoxy prevents water from reaching the internal components of the Mothbox while still enabling the device to take clear photos. Once the epoxying process was finished, we left the boxes to cure overnight.
Photo of a workshop attendee drilling a front lens hole onto the Plano 1460-00 box
Photo of a workshop attendee drilling arm holes onto the Plano 1460-00 box
Photo of the modified Plano 1460-00 boxes after being epoxyed
Bonus: Learning how to process data from the Mothbox
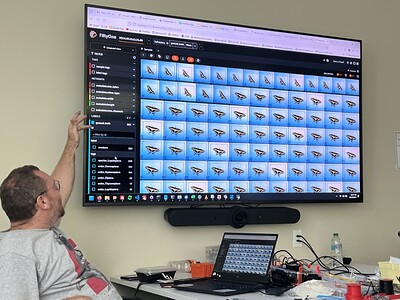
We still had a bit of time left after we finished the external components of the Mothbox, so Andy walked us through how to organize and process data when deploying the Mothbox. He also gave us a quick overview of the AI machine visioning program he is working on, which aims to enable automatic insect detection in images captured by the Mothbox. The goal is to have a program that can run locally so that users can upload and organize their data offline, which is essential when working in the field with limited access to the internet.
Photo of Andy demonstrating the machine learning workflow for detecting insects in the images captured by the Mothbox
Workshop Day 2: Everything comes together, and Andy gives a public talk!
With most Mothboxes near completion, the second day of the workshop focused on testing the Mothboxes and troubleshooting issues.
Wrapping up our Mothboxes
On the morning of the second day, we were tying up loose ends. A few of us finished our aluminum heat sinks for our Mothbeams, while others were cutting out and felt glued to our targets. We also drilled a small hole in the bottom of the modified Plano 1460-00 boxes to add charging ports for the batteries.
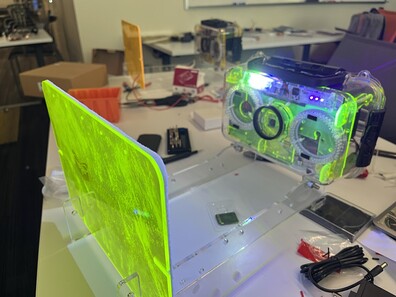
Then, voila, we were done! We turned on our Mothboxes to check how they were running, and if there were any issues, we worked with Andy to troubleshoot them.
Photo of a participant’s completed Mothbox, with attractor lights running and the target attached.
Open Lecture on the Mothbox
The workshop concluded with a public lecture by Andy on the Mothbox and the importance of low-cost and open source technologies for understanding the natural world around us. You can see a recording of Andy’s talk here!
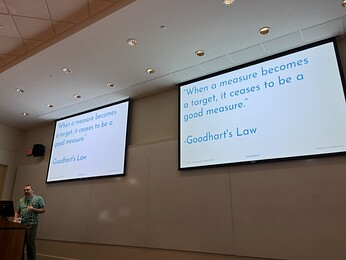
Photo of Andy giving a public lecture at Georgia Tech
What’s next for the Mothbox team?
Over the next few months, the goals for the Mothbox team are to develop a new version of the Mothbox that is scalable and easy to manufacture and to finalize the AI machine learning pipeline for detecting and identifying insects from Mothbox data. We will also be doing field testing to better understand the Mothbox’s battery life in the field.
For more information on the Mothbox project, visit our GitHub. In the meantime, I’ll be back with more project updates next month!
